Step 1
Open the eQTL & SC workflow
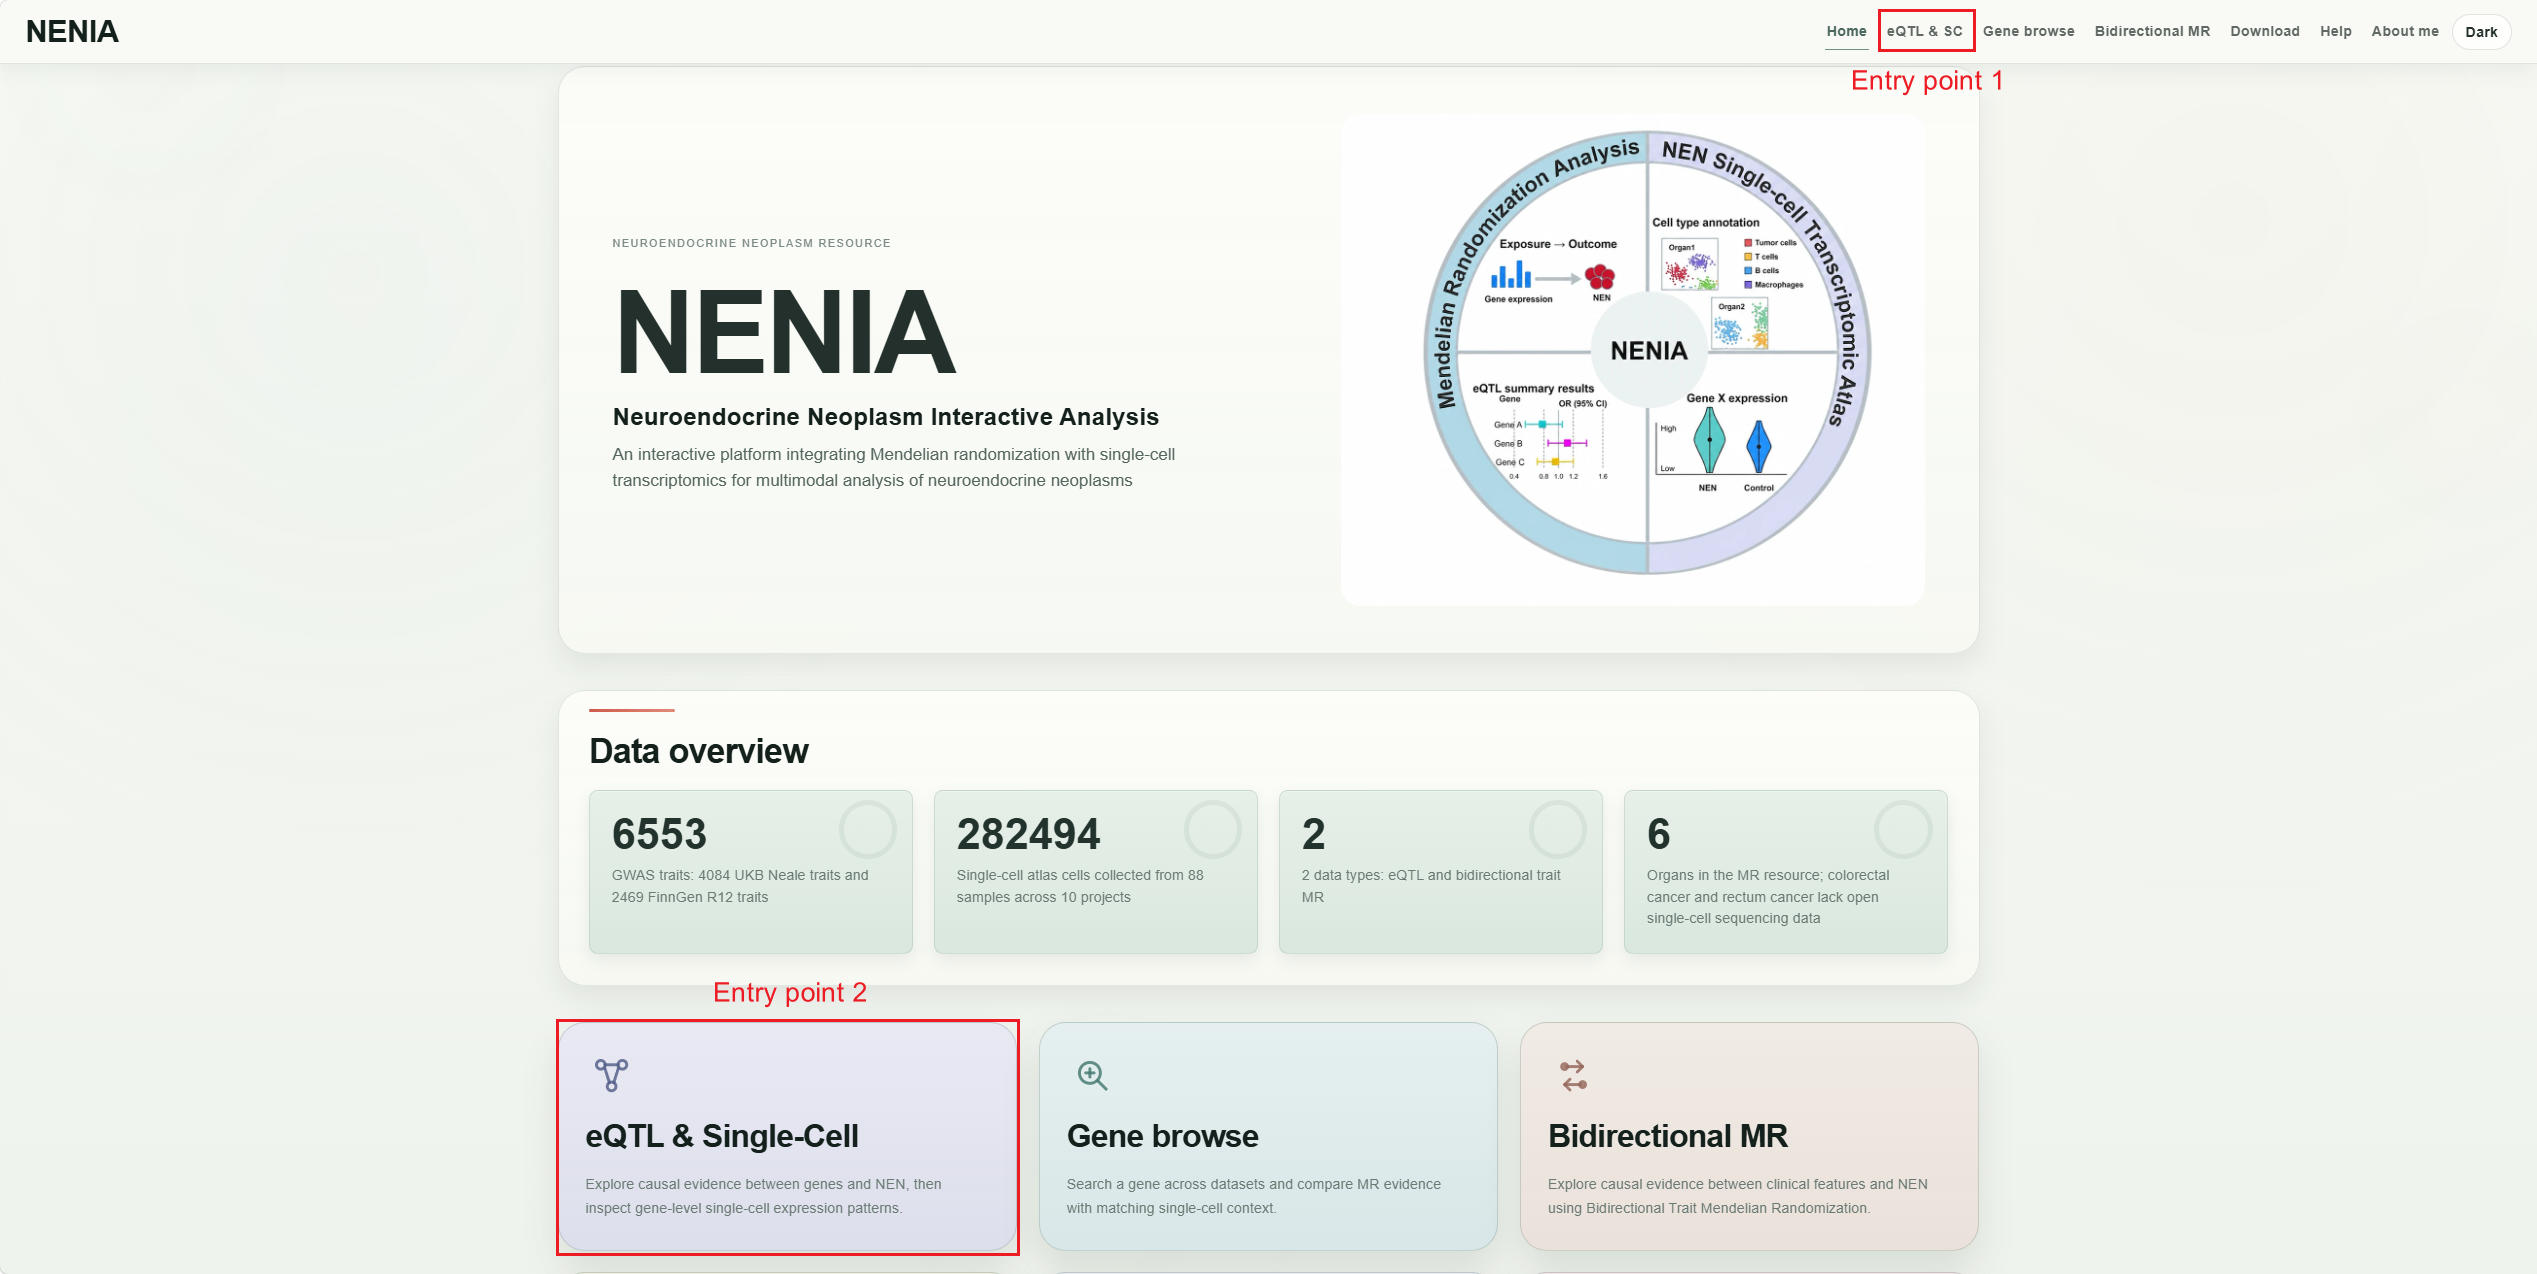
Use the eQTL & SC navigation item or the home-page entry card to enter the combined MR and single-cell workspace.
User Guide
Follow three visual walkthroughs for moving from eQTL-guided MR evidence to single-cell gene expression, searching one gene across datasets, running bidirectional trait Mendelian randomization, and exporting AI-ready Markdown for downstream interpretation.
Choose an MR result set, review summary plots, open a gene, inspect single-cell atlas evidence, and export an AI report Markdown file.
Search one target gene, compare available datasets, export tables, and download AI-ready Markdown for interpretation.
Move from phenotype selection to bidirectional evidence review, then export a compact Markdown report for LLM analysis.
Walkthrough 01
Use this workflow to start from eQTL-guided MR evidence, continue into single-cell gene expression inspection, and export a Markdown context file for AI-assisted interpretation.
Use the eQTL & SC navigation item or the home-page entry card to enter the combined MR and single-cell workspace.
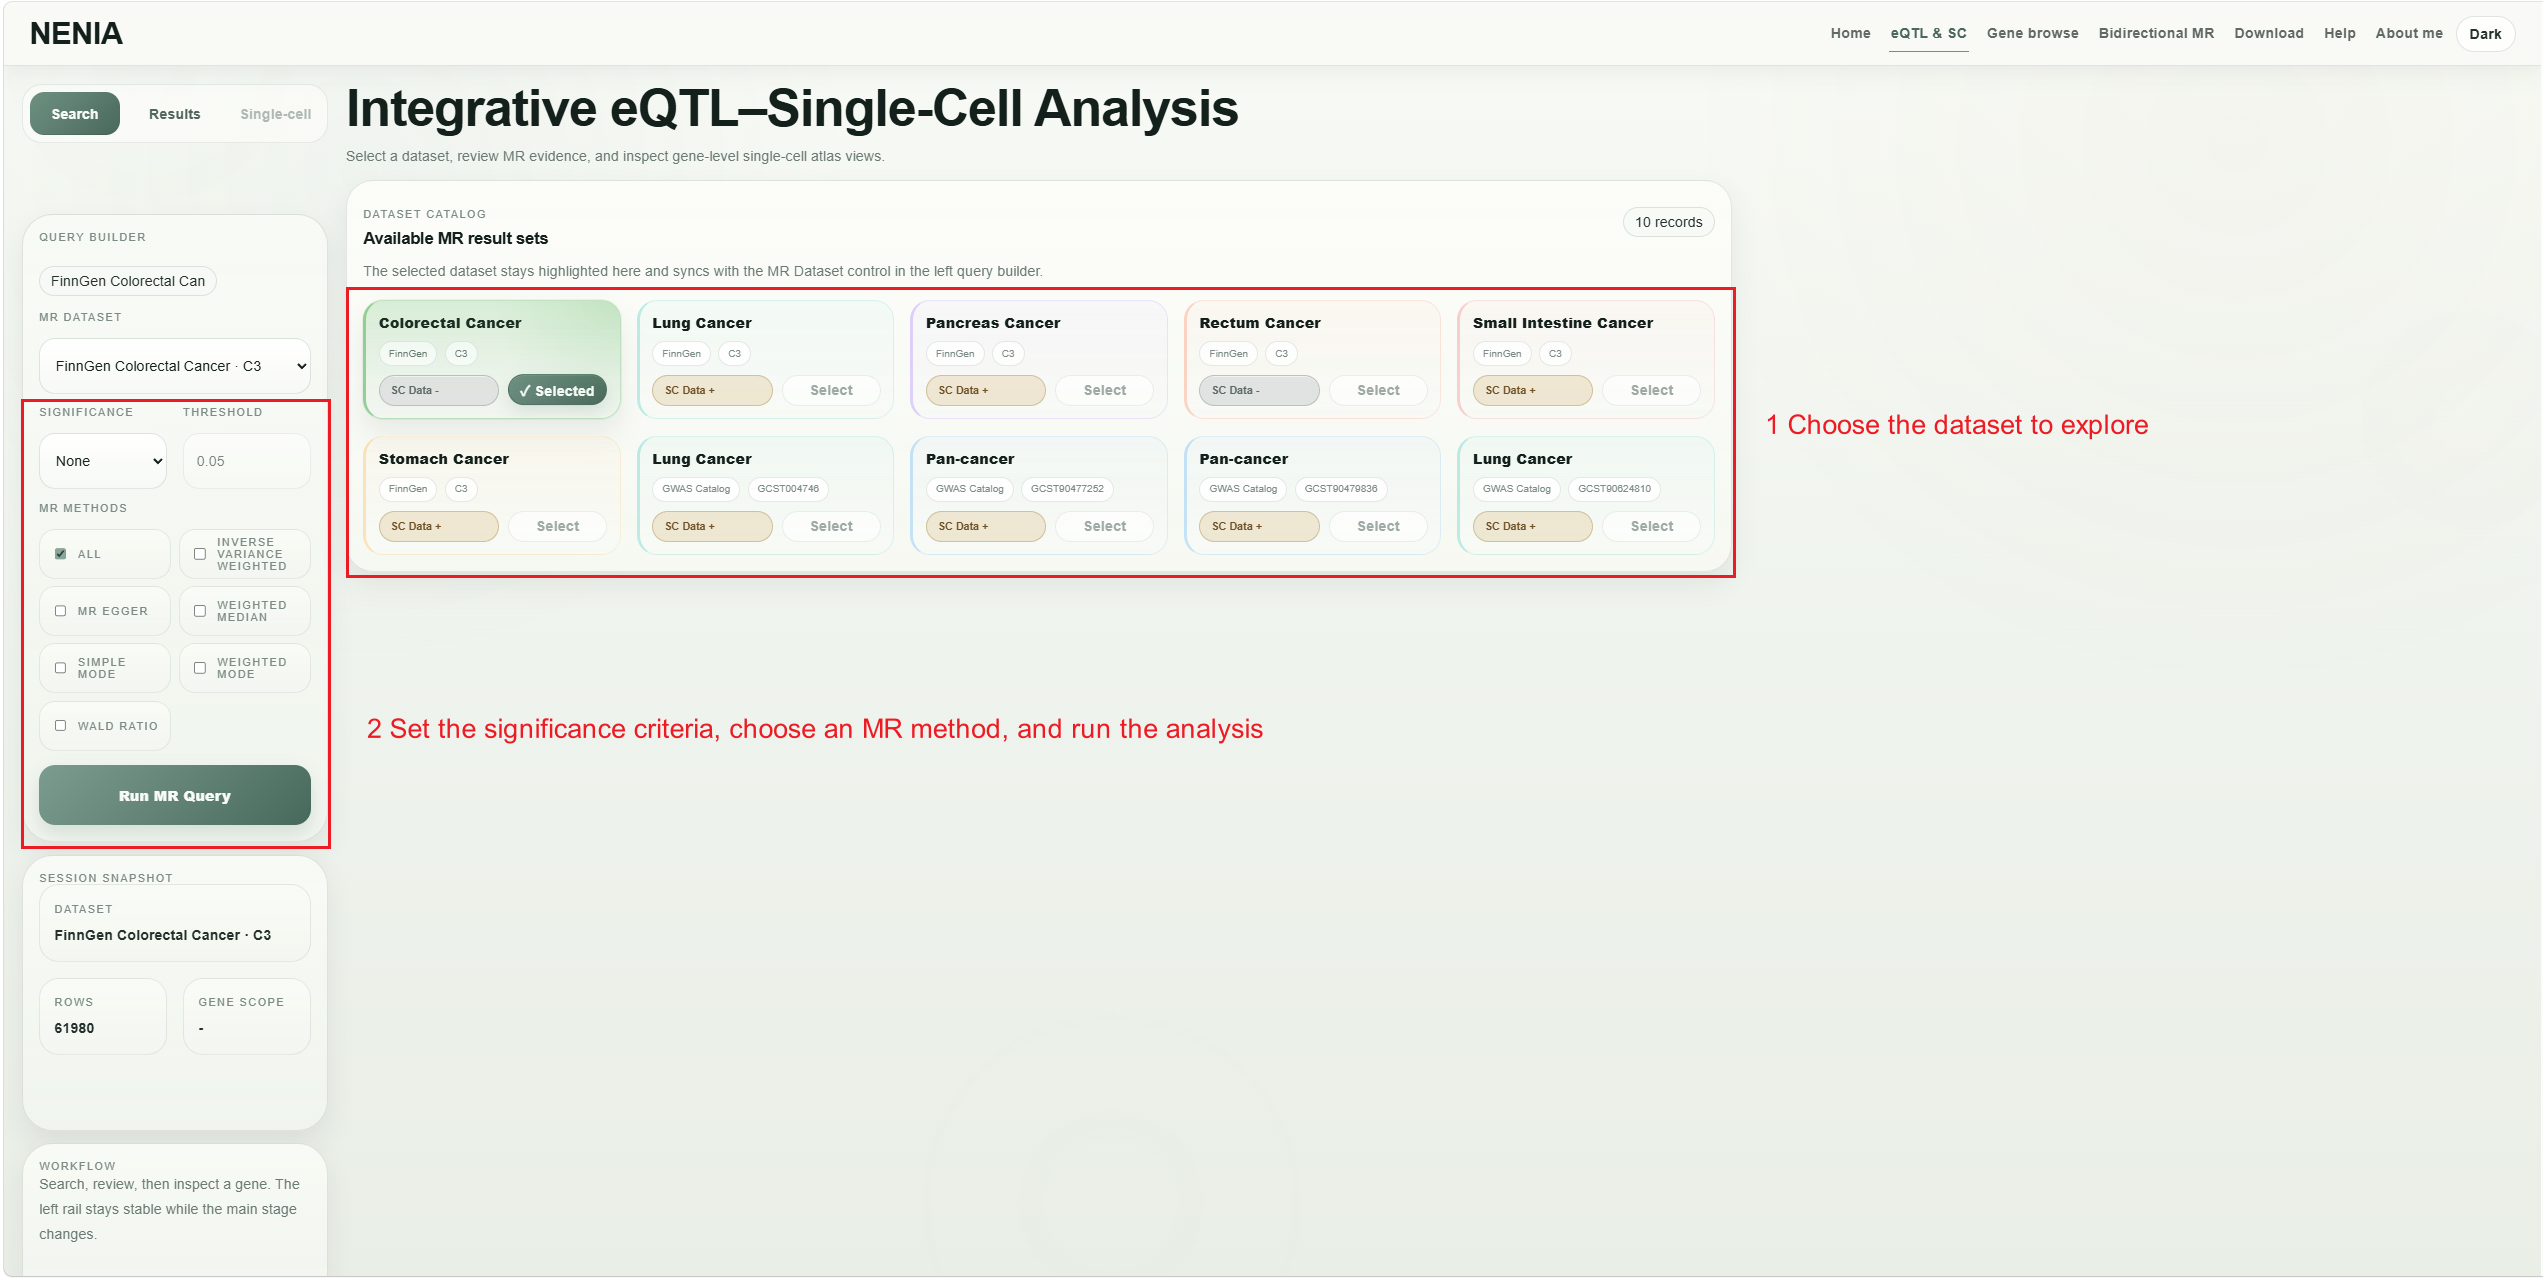
Select the MR result set, then set the significance criteria, threshold, and MR method before running the query.
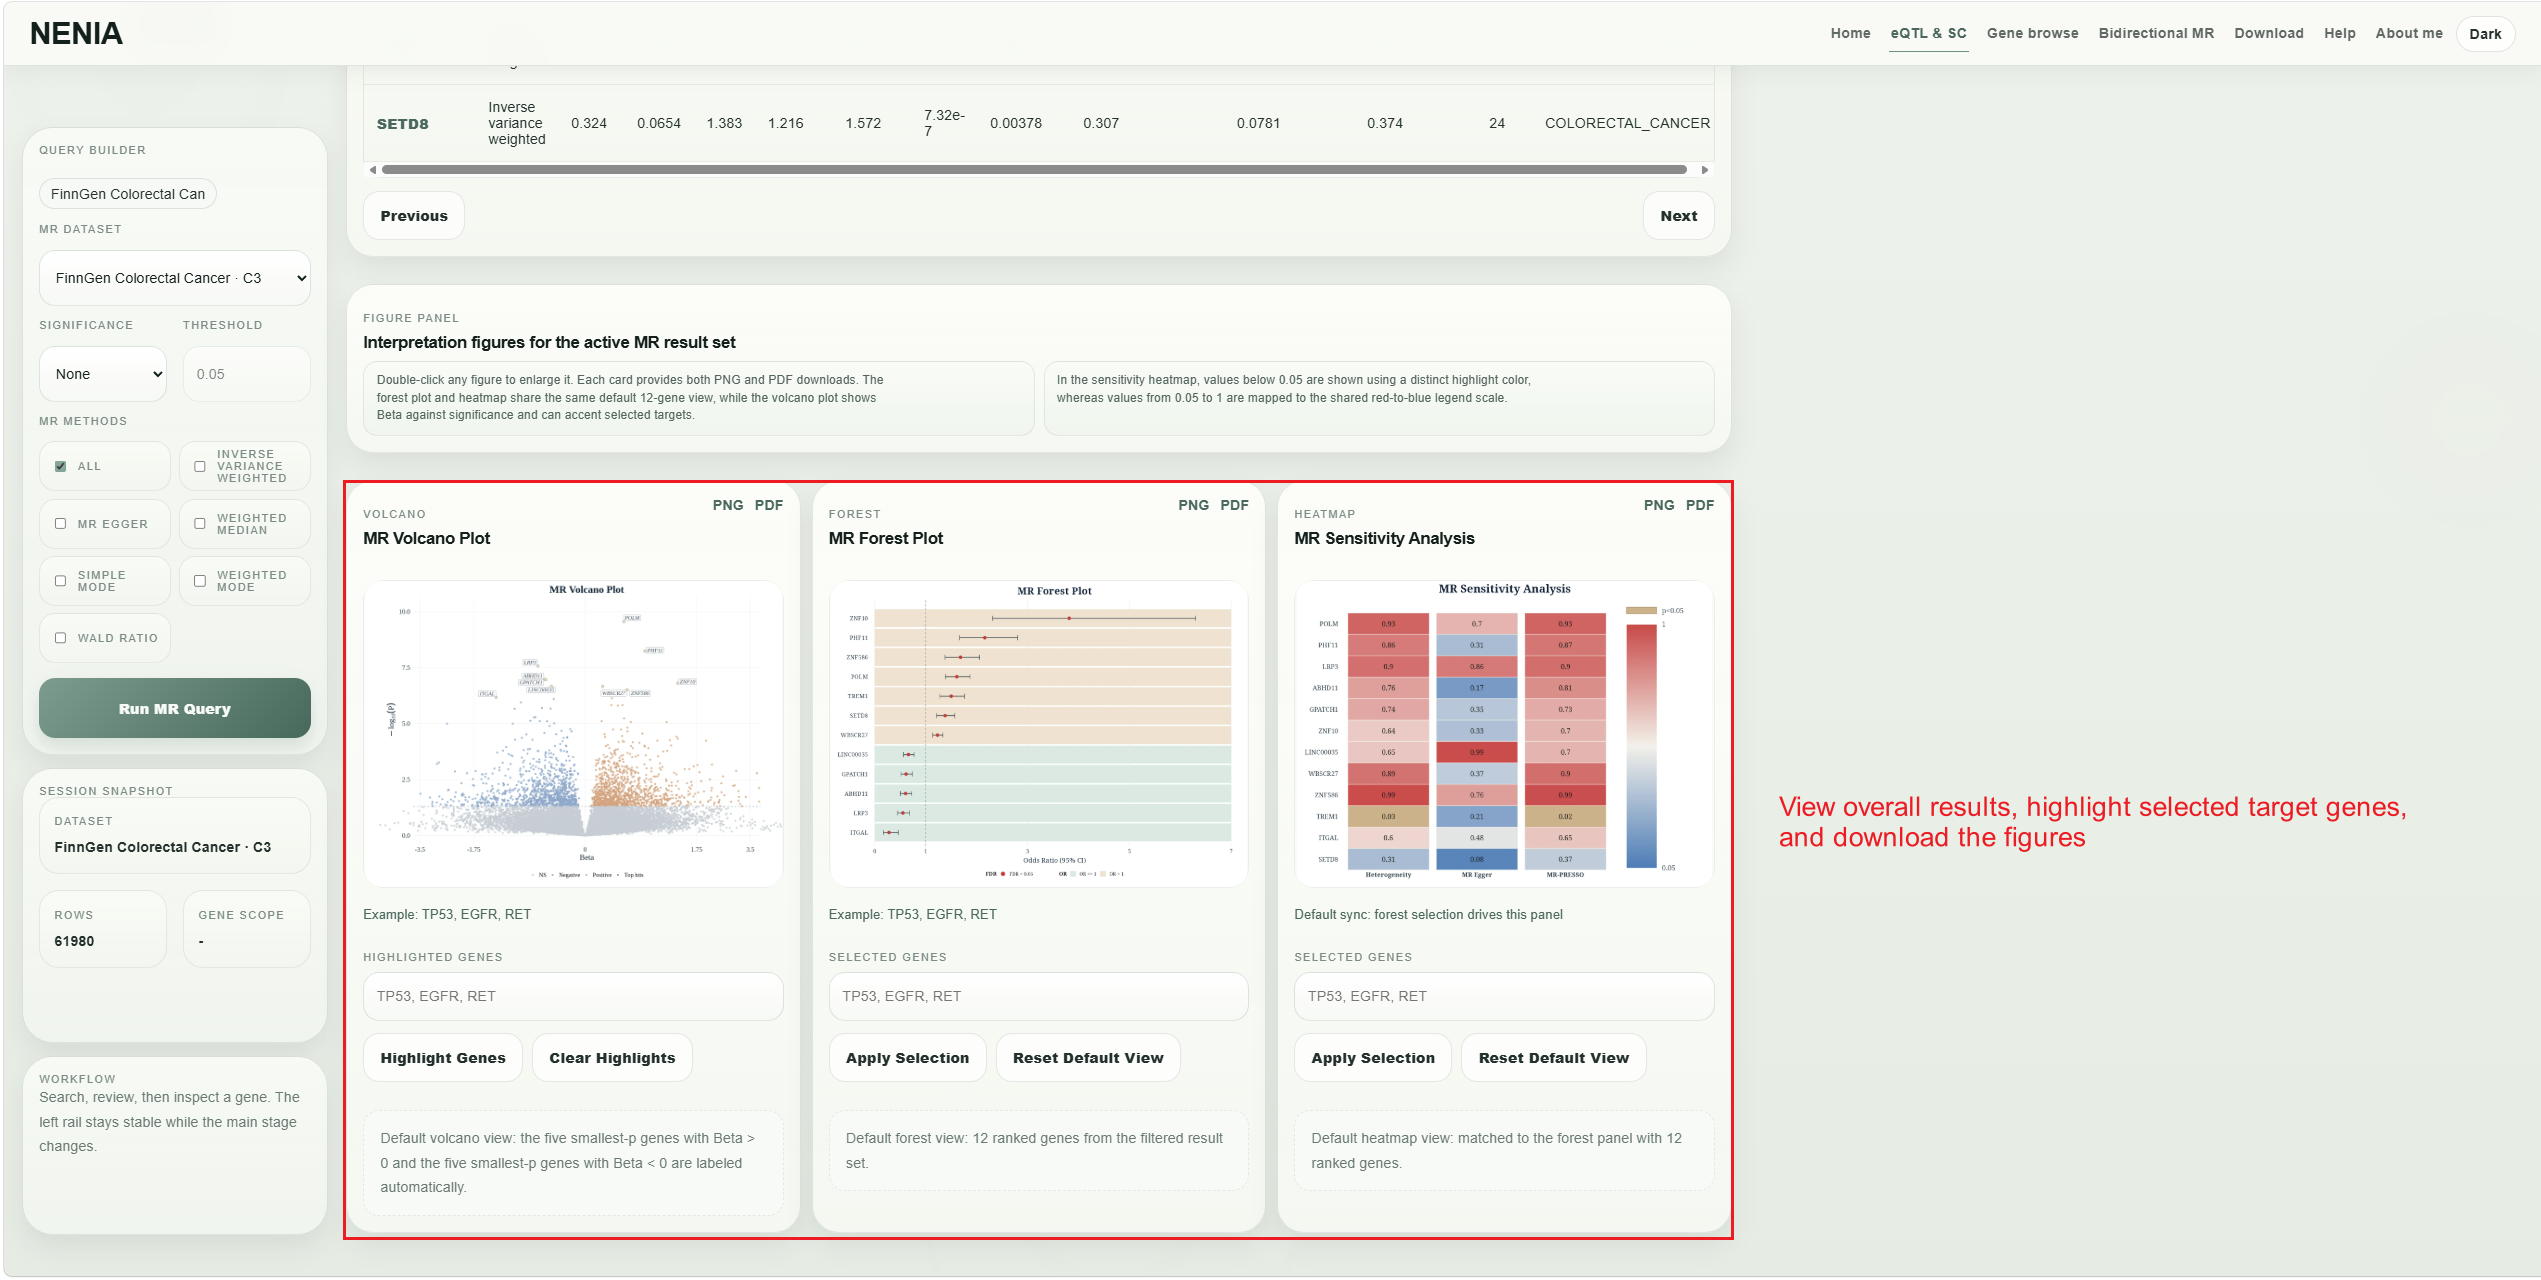
Review the volcano, forest, and sensitivity panels, highlight selected genes, and export figures when needed.
Use the ranked MR table to move from a significant gene row into the single-cell analysis page.
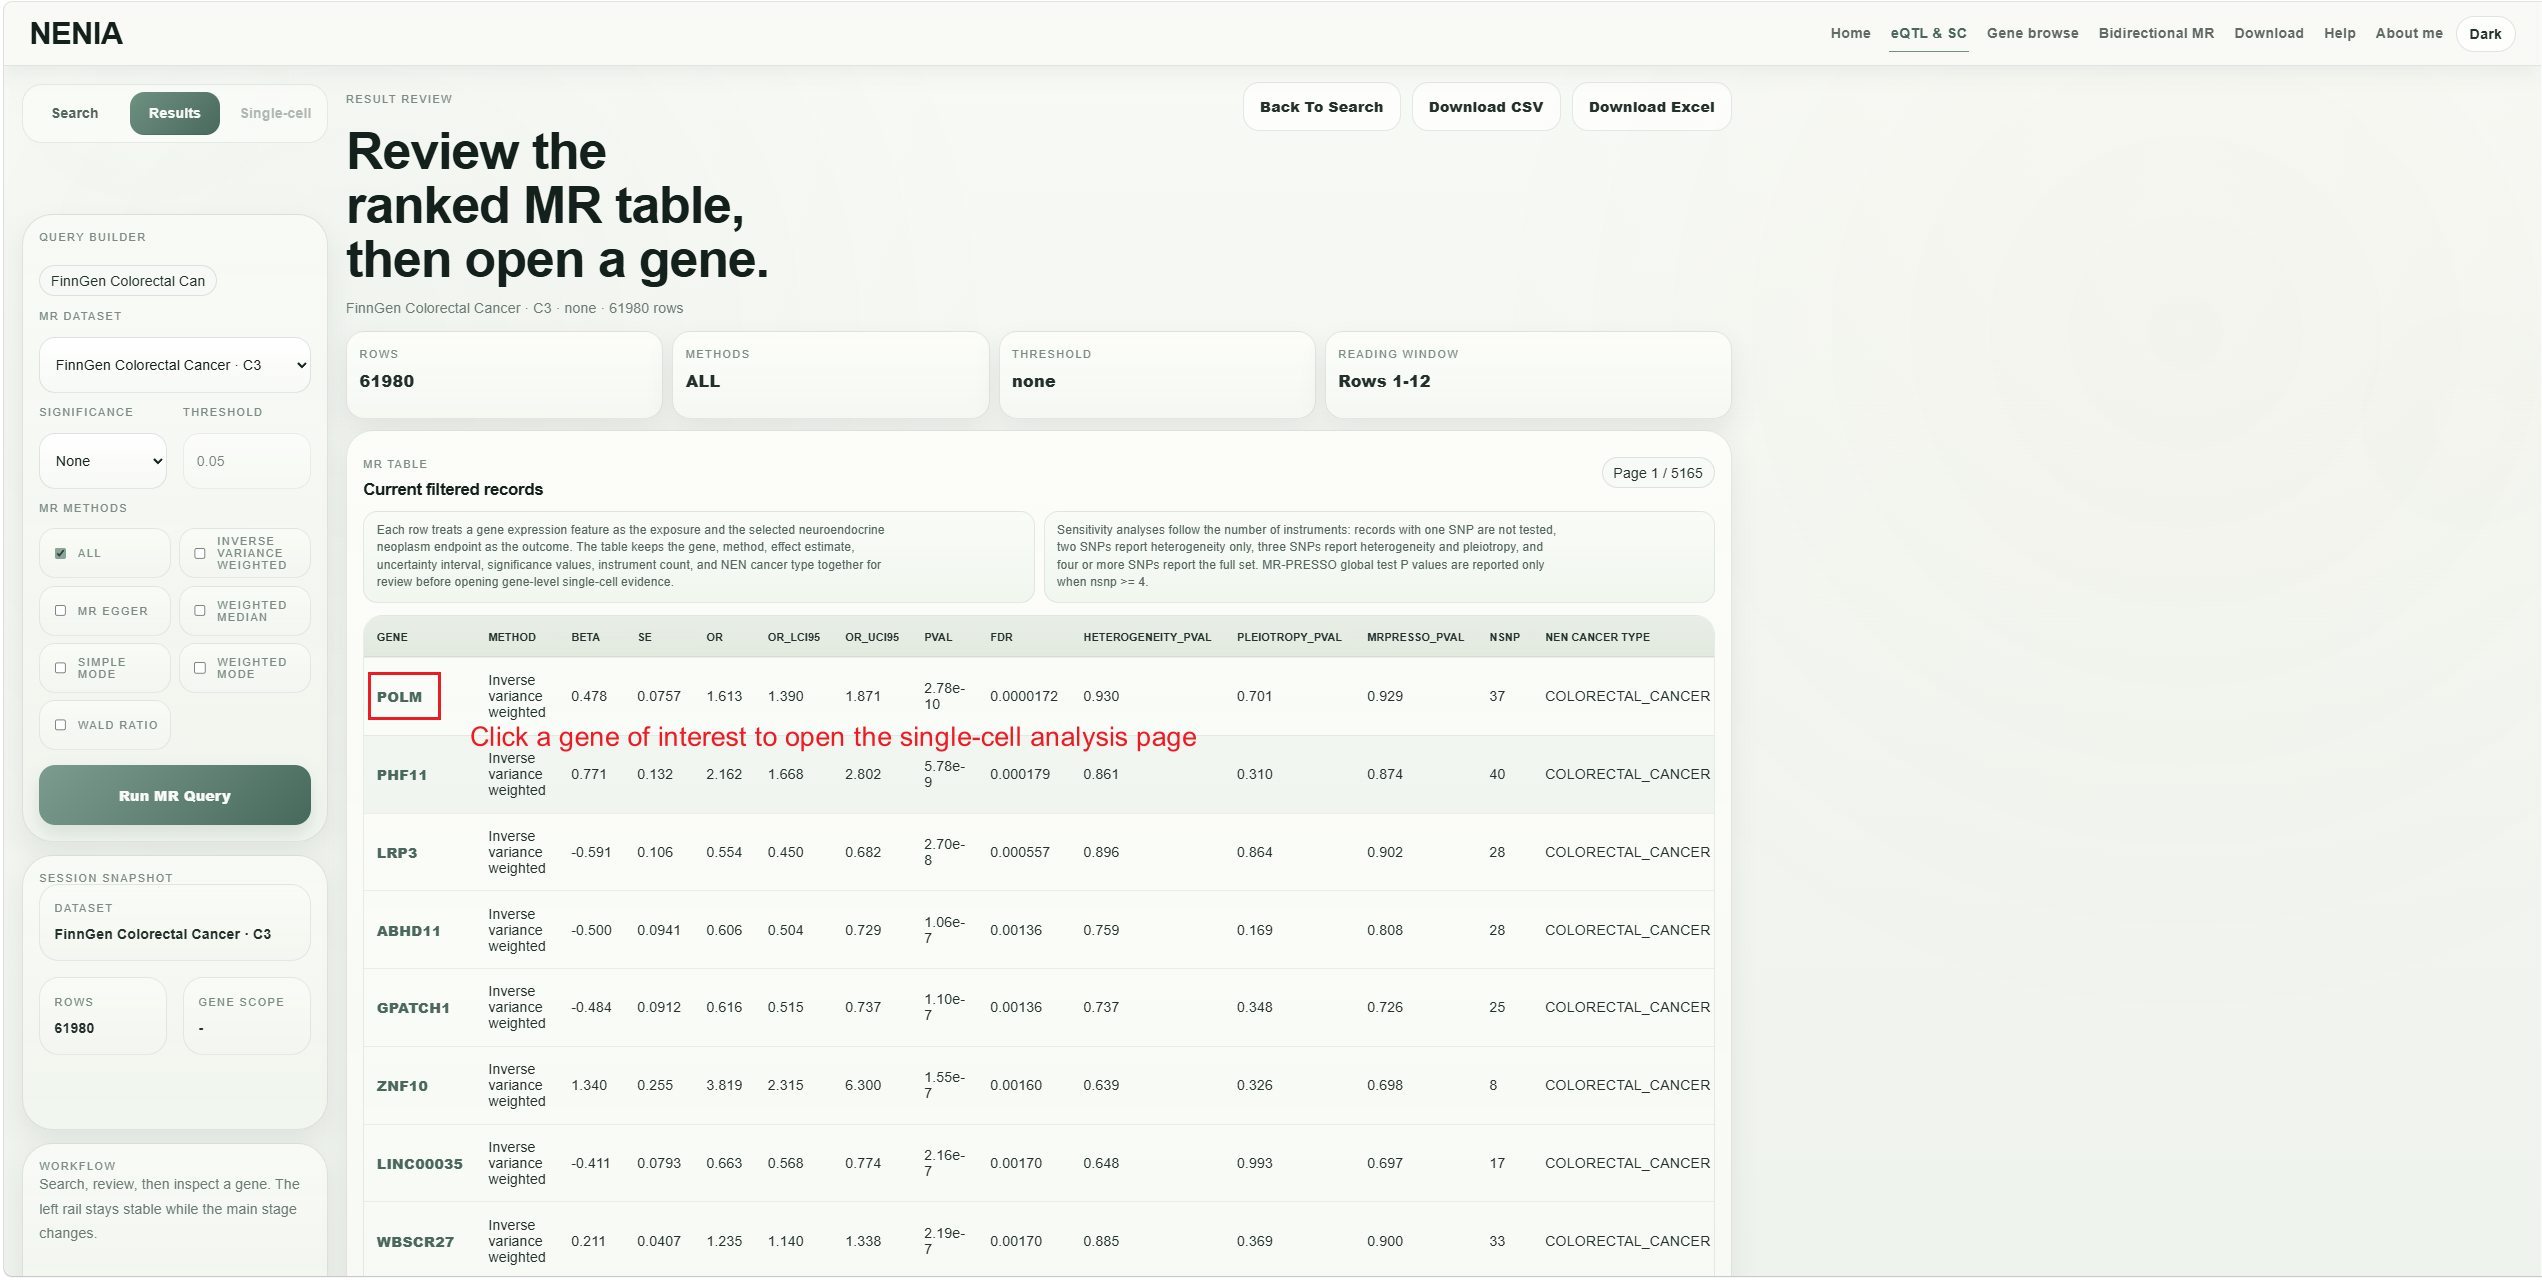
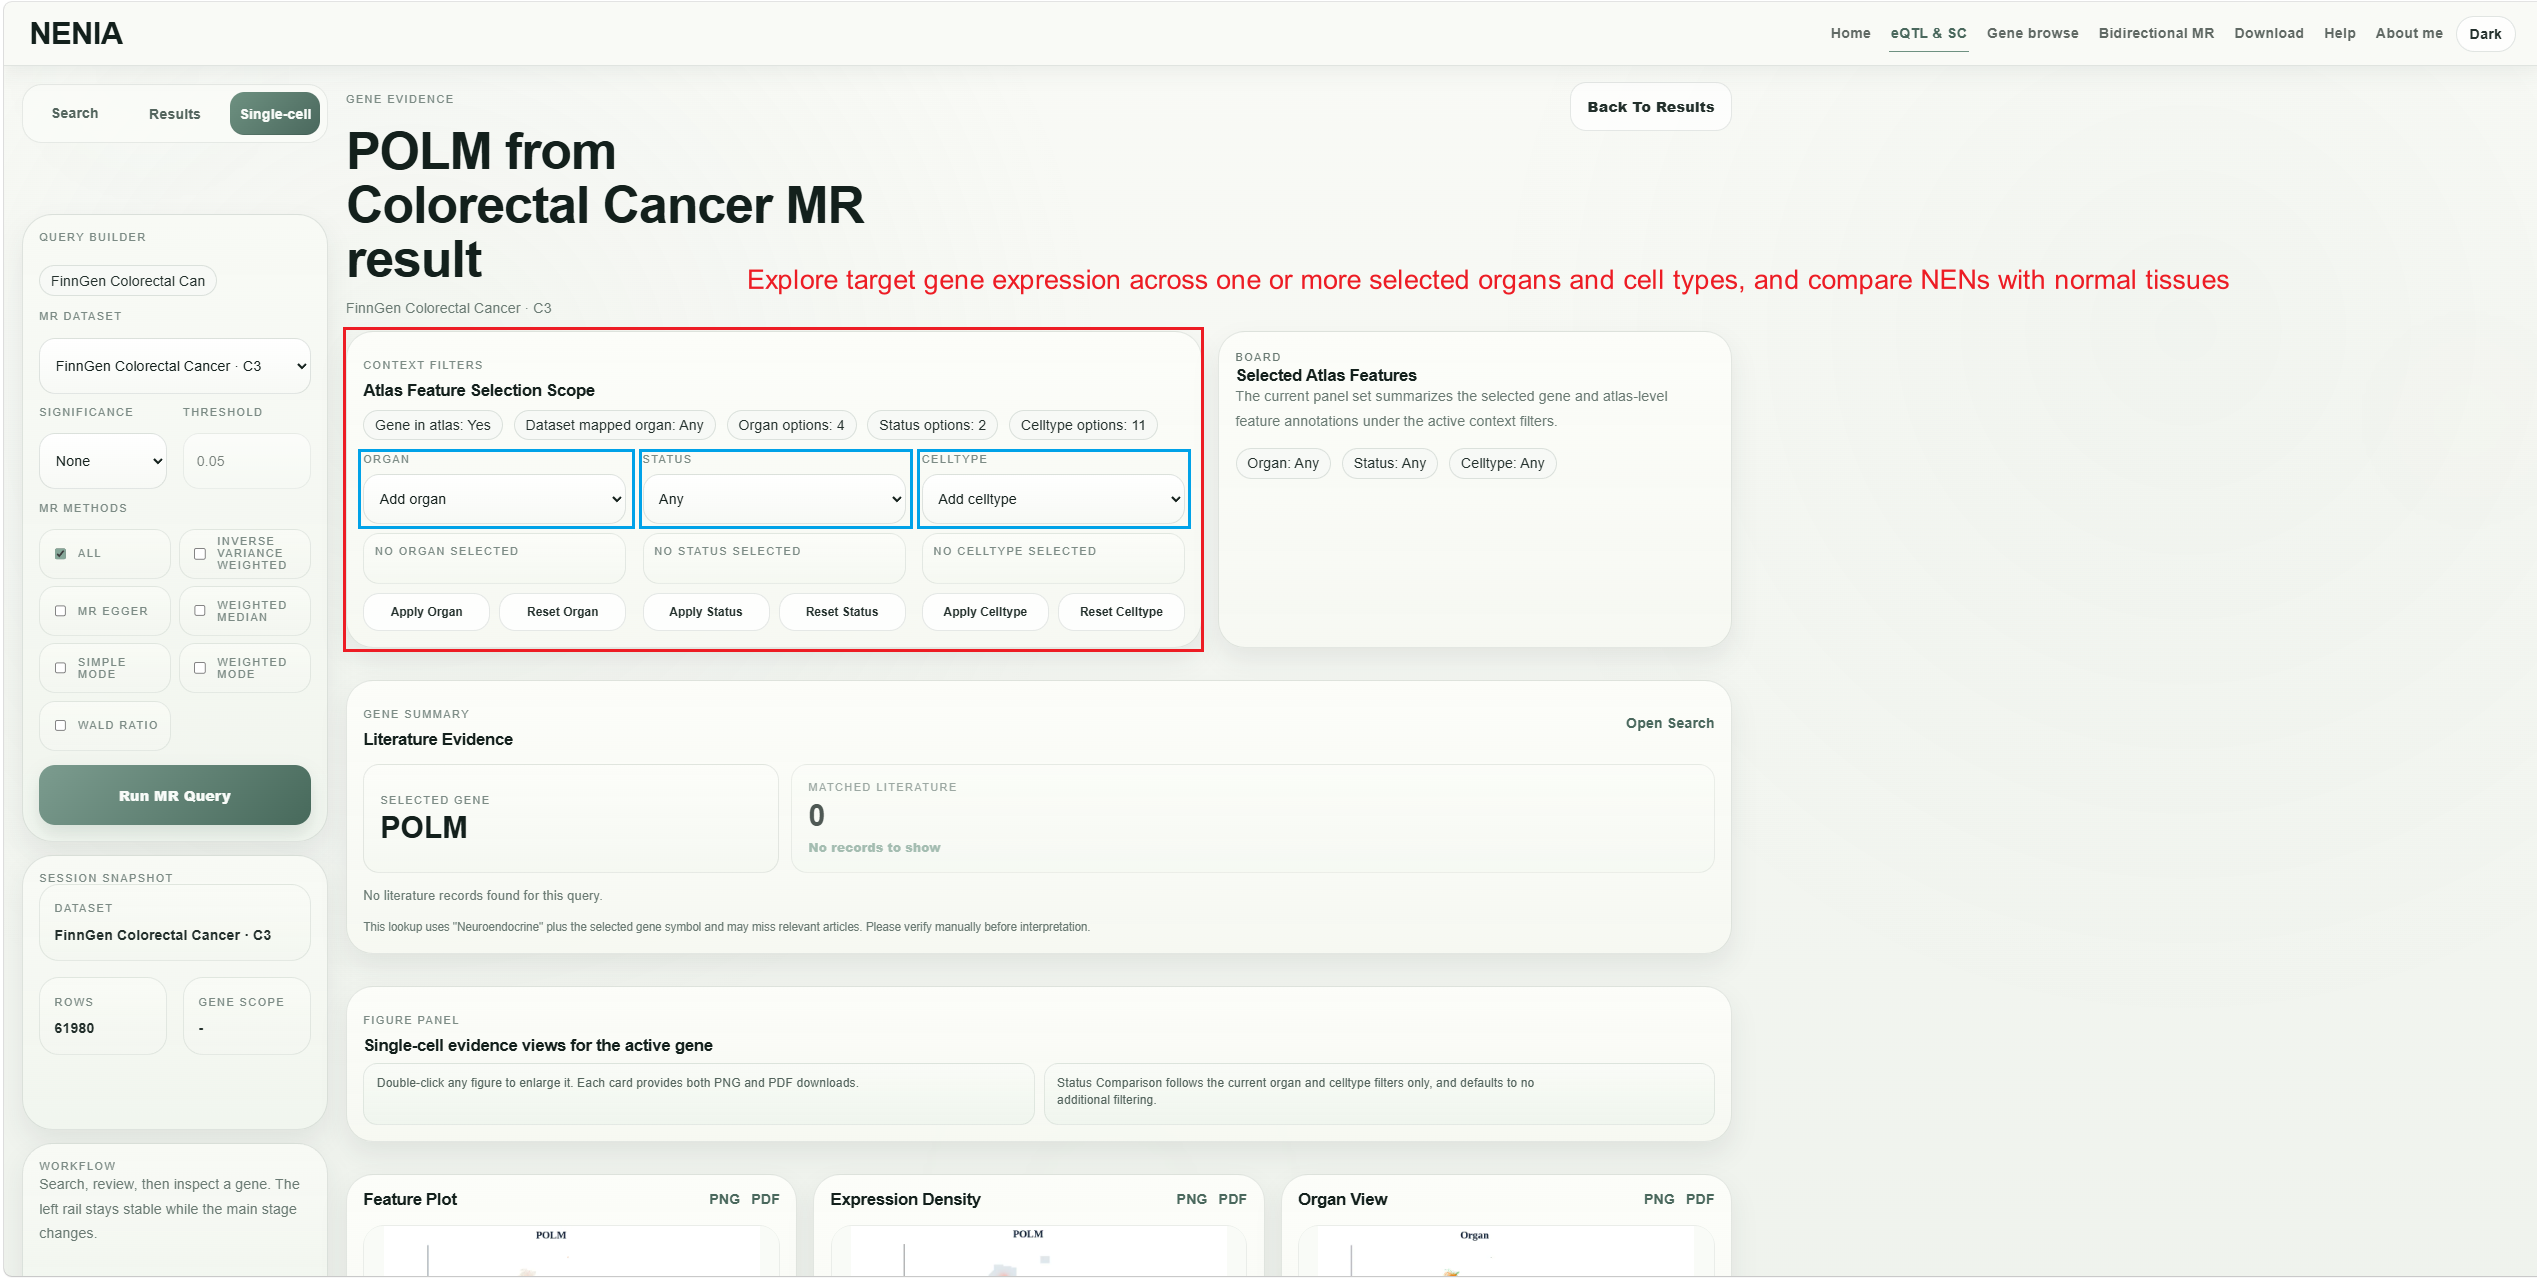
Select one or more organs and cell types, then compare NENs and normal tissue contexts before interpreting the selected gene expression views.
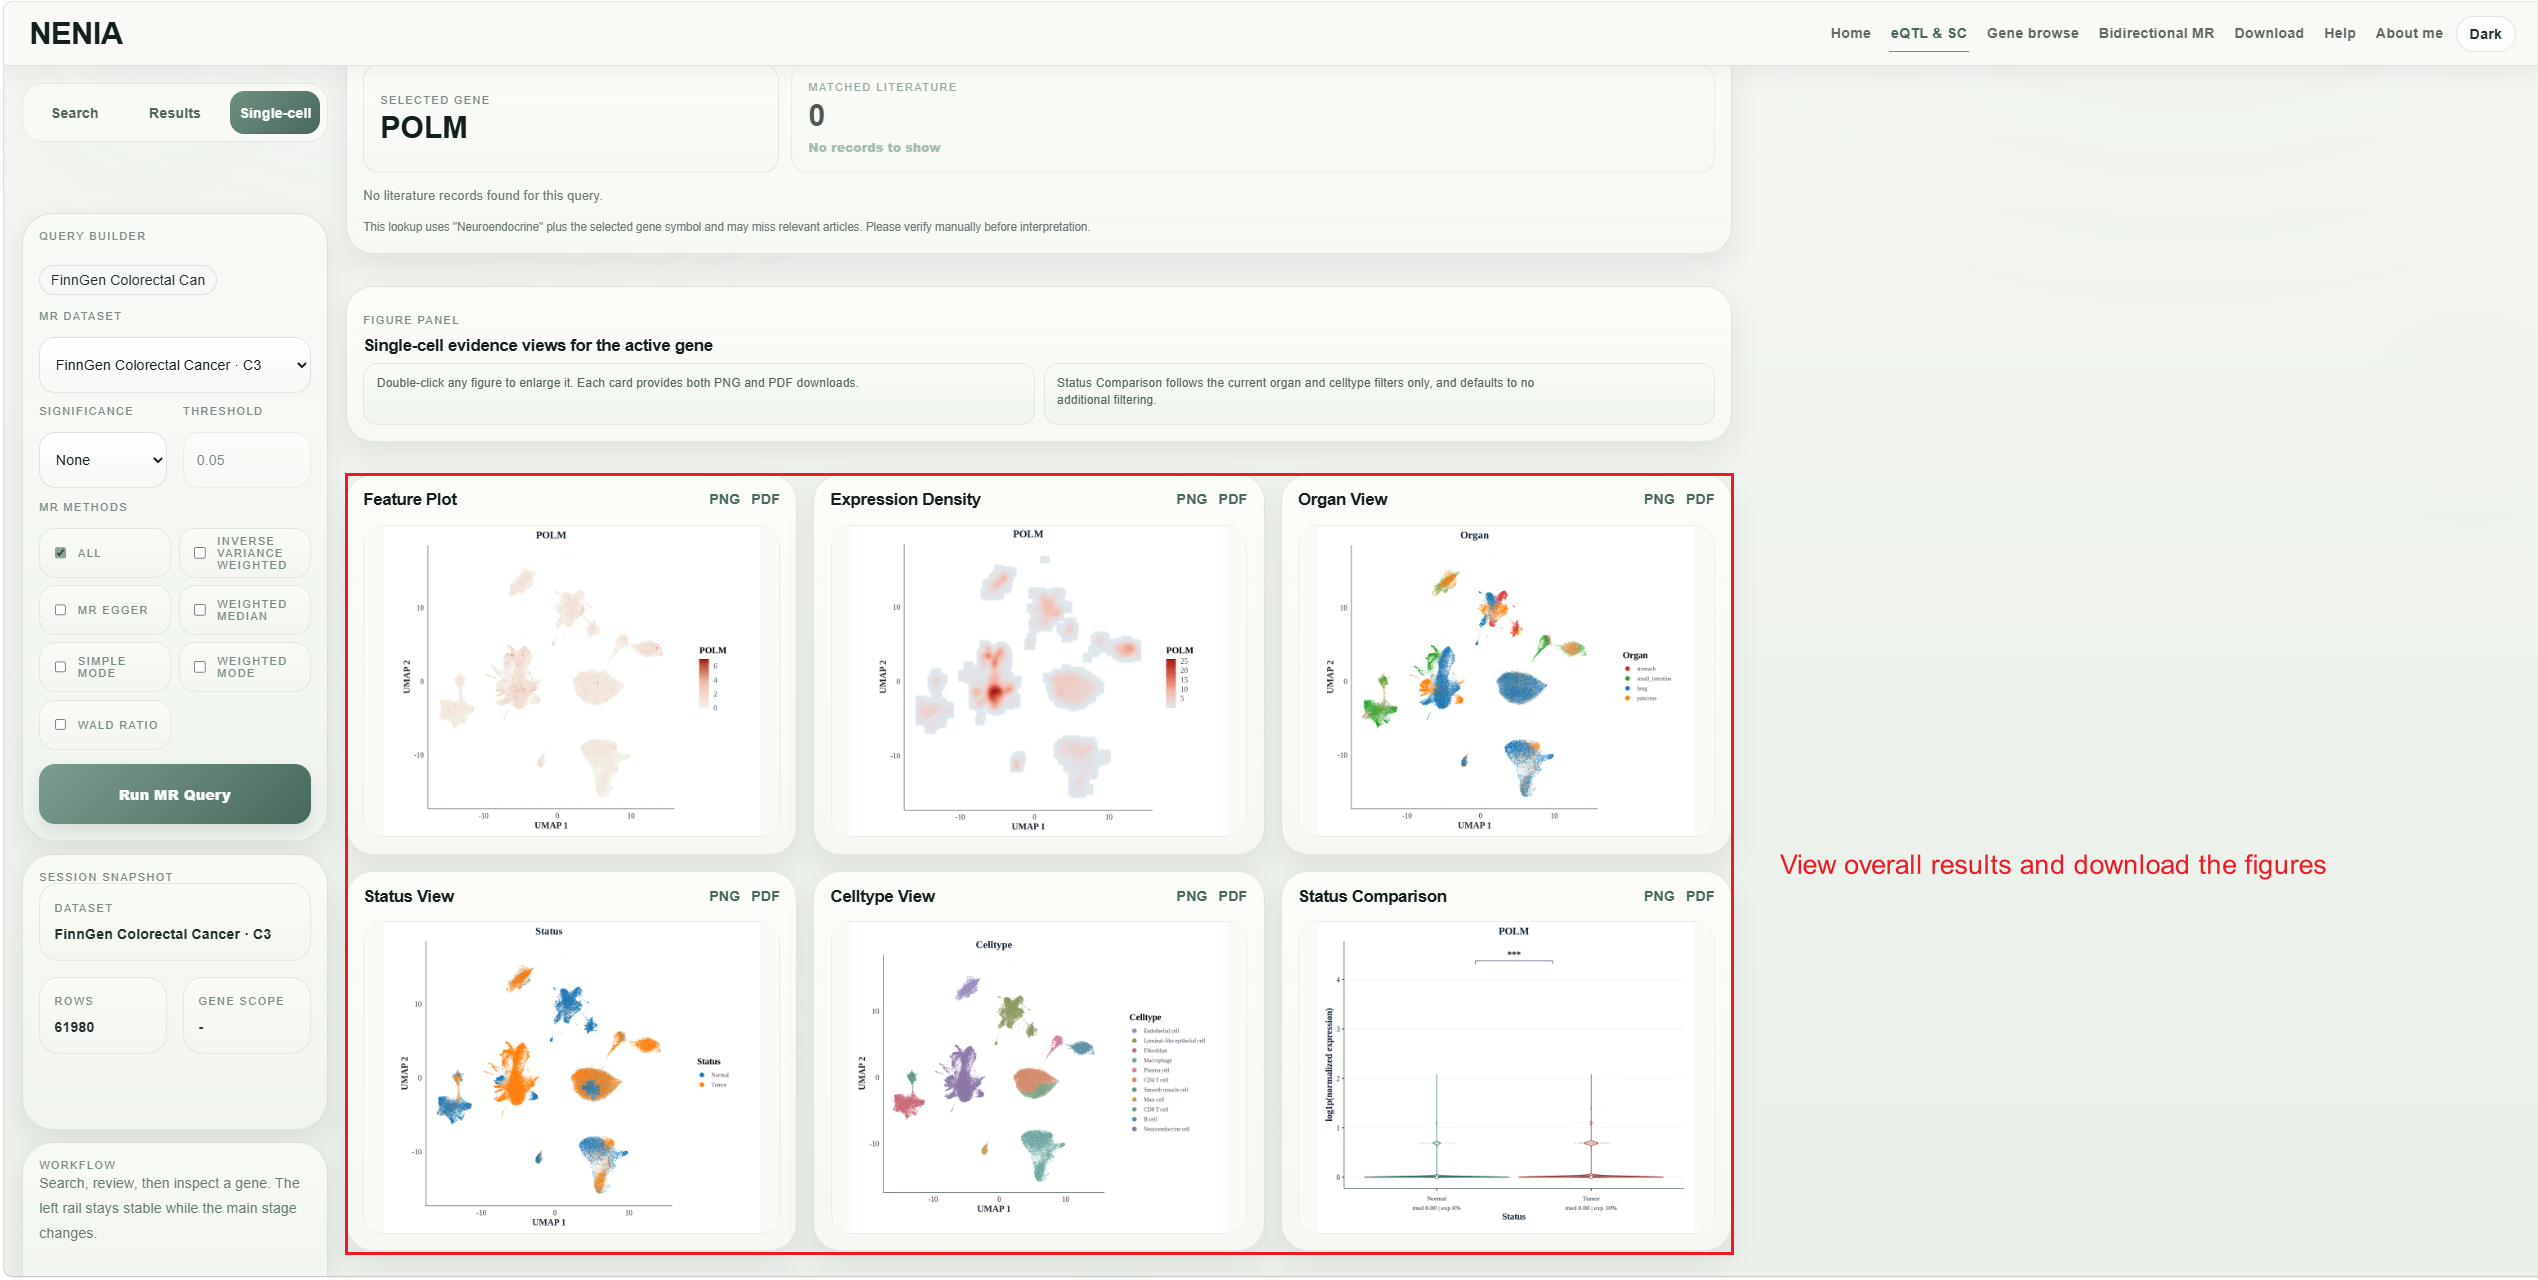
Use the single-cell figure panels to compare tumor and normal tissue views and download the relevant plots.
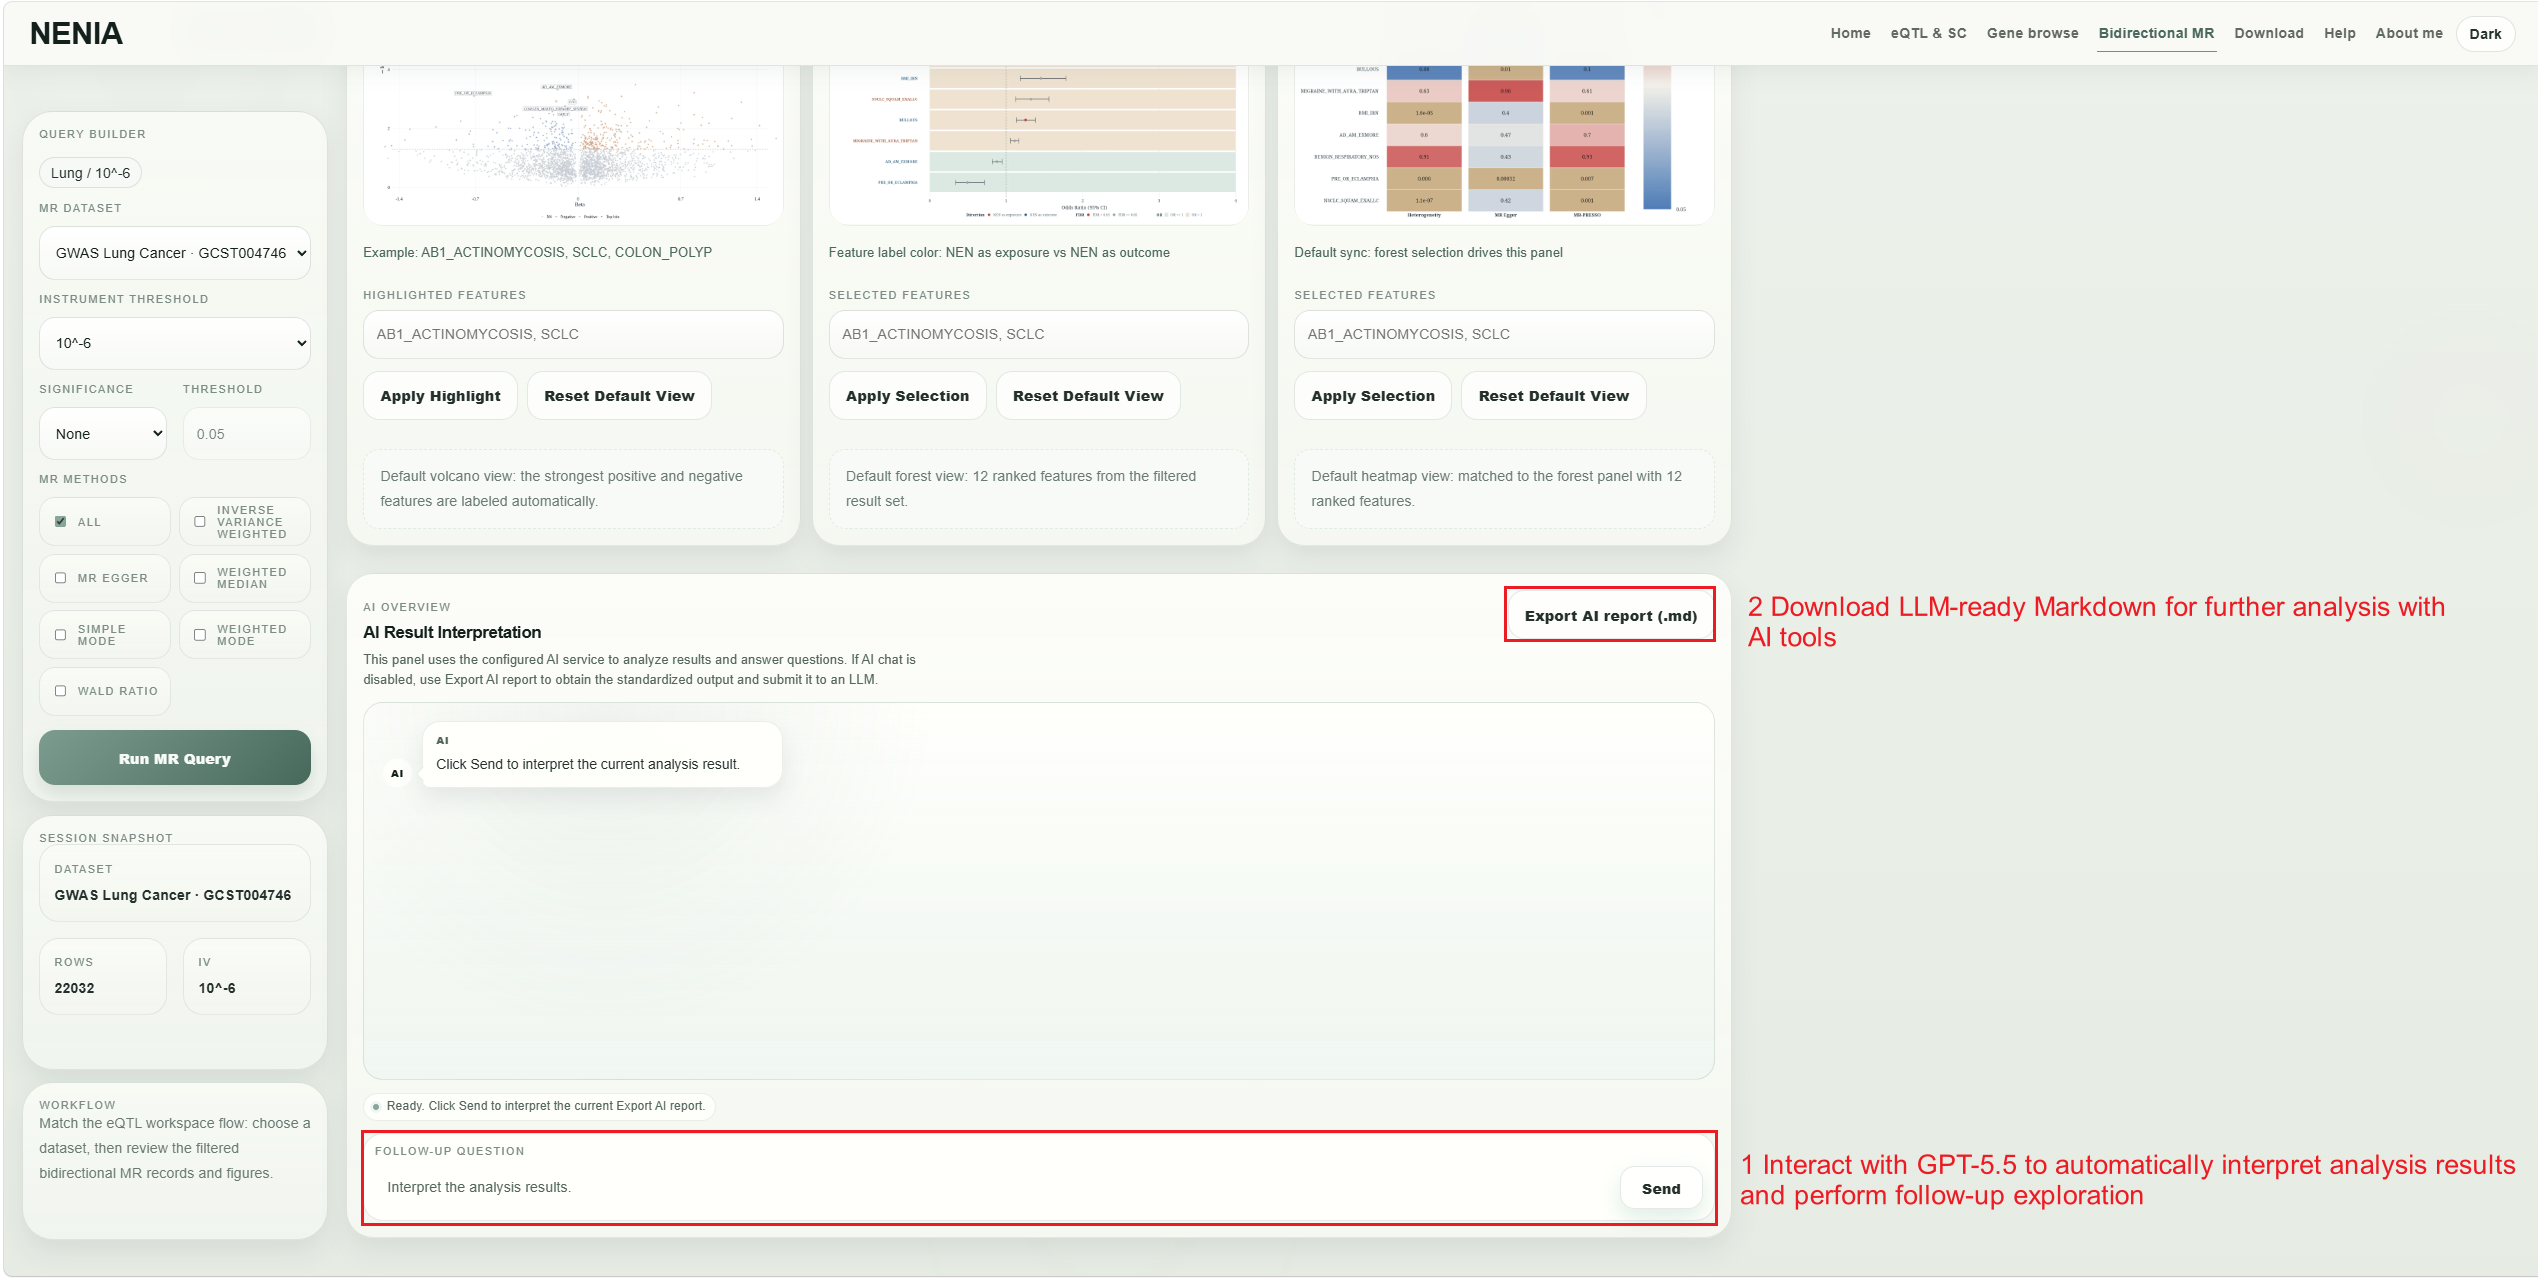
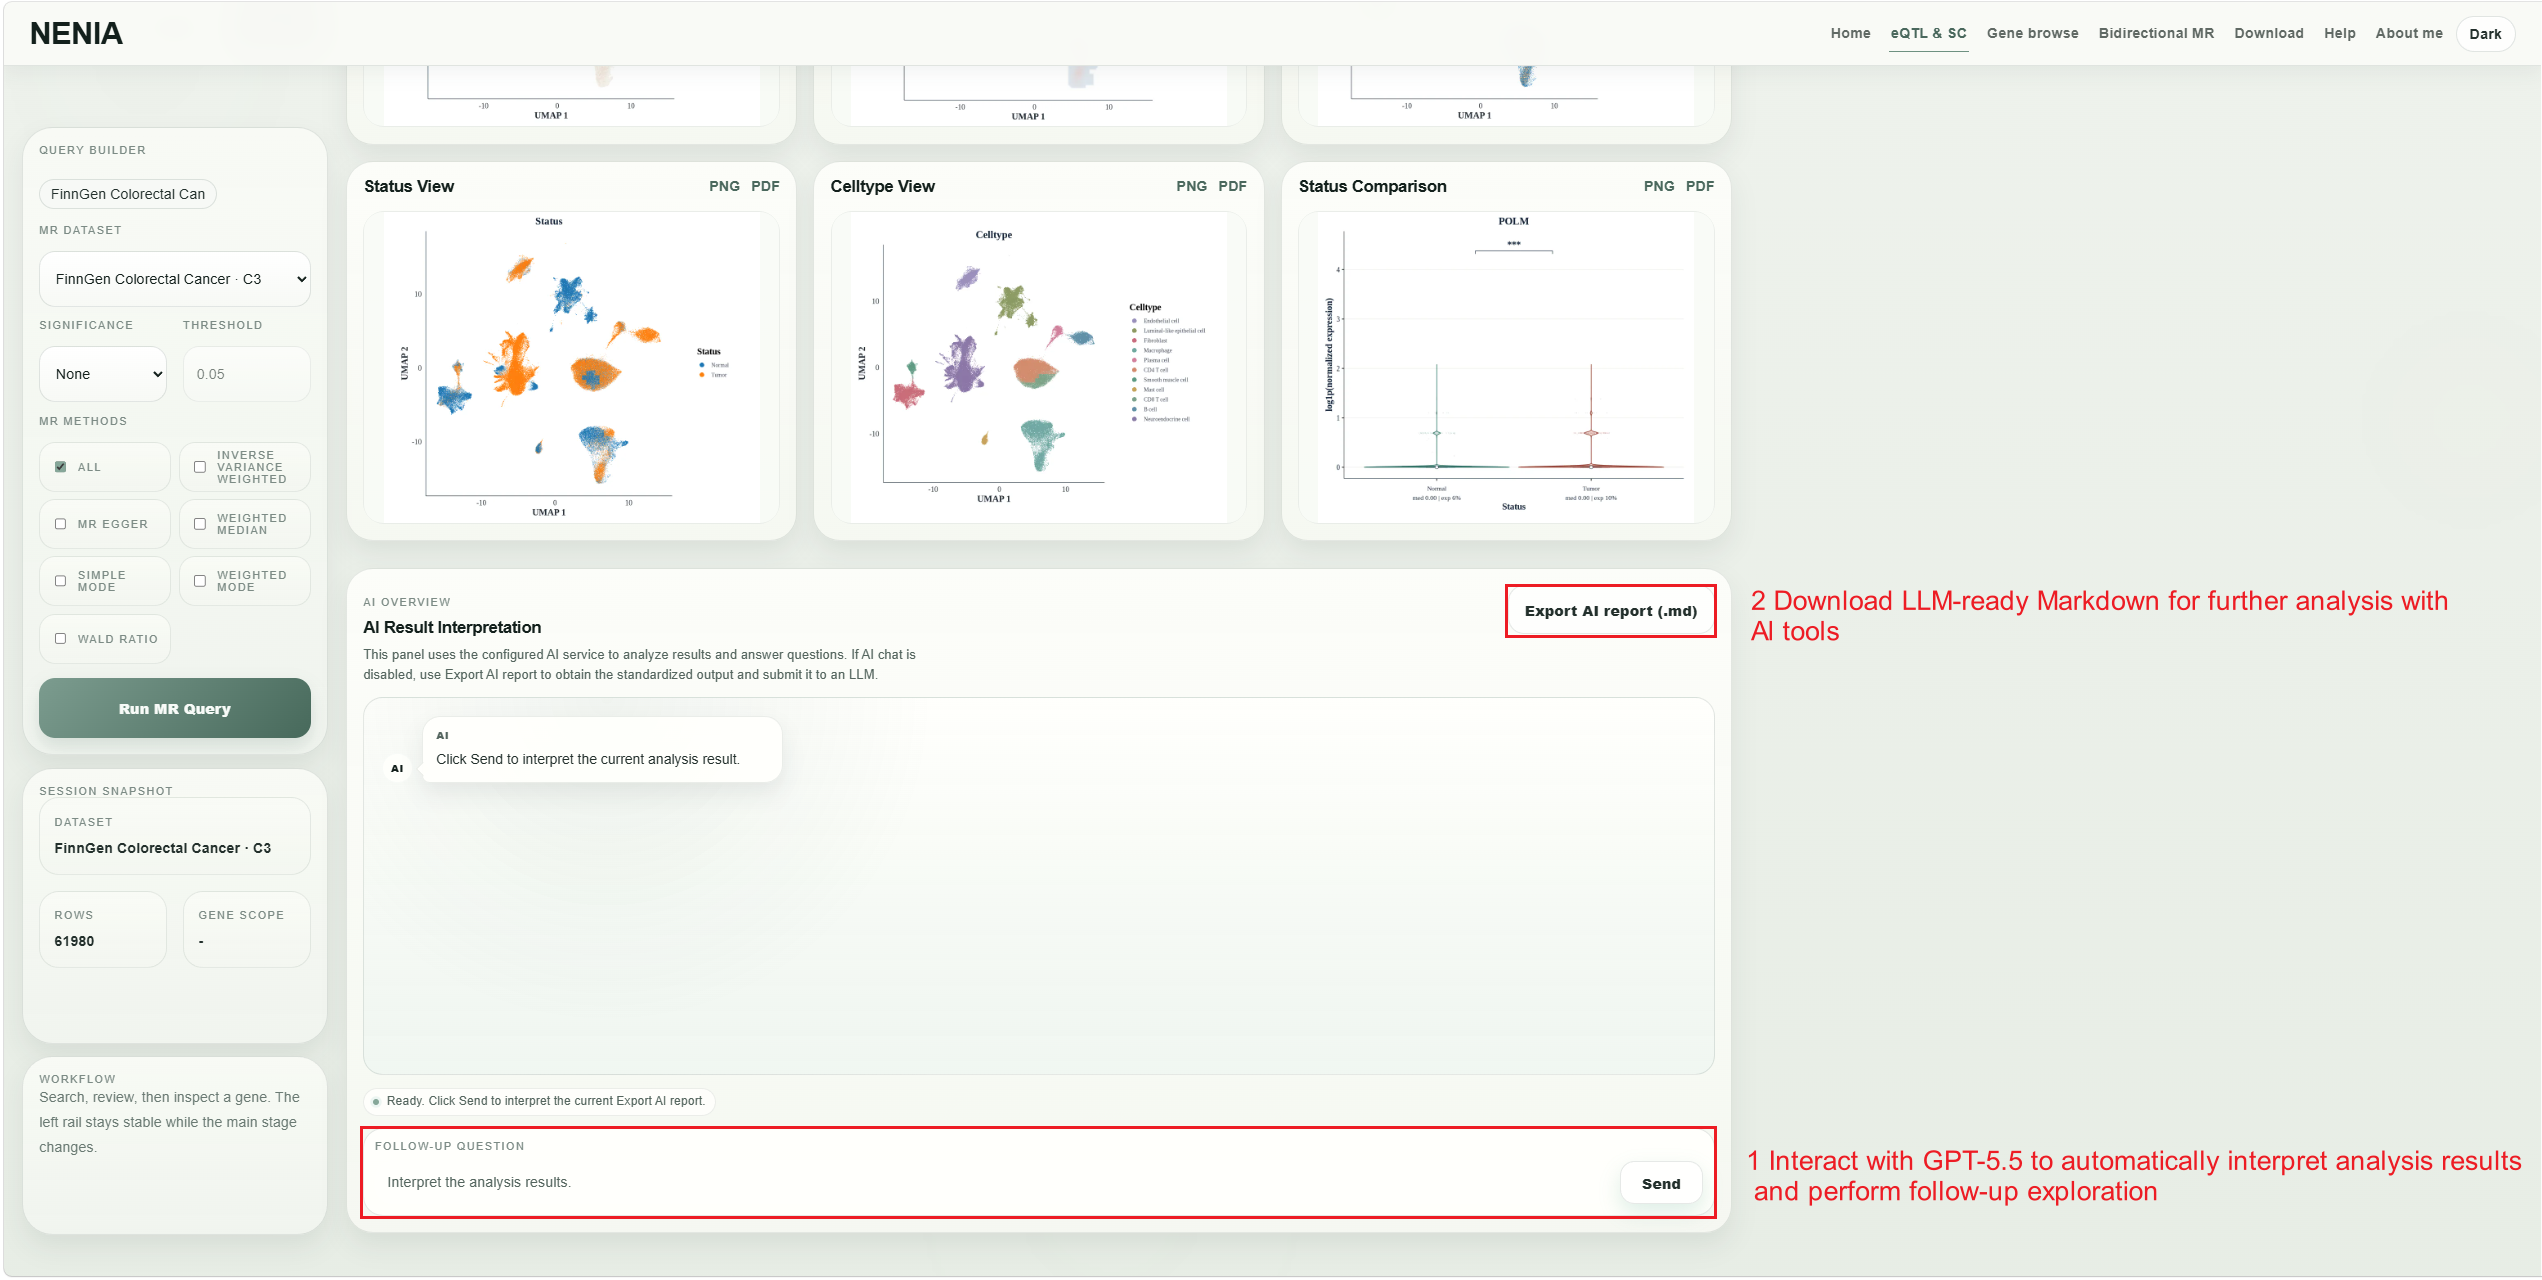
Use the built-in GPT-5.5 panel to analyze results or ask follow-up questions up to three times per day. The first request is fixed as result interpretation with a prepared prompt; for deeper analysis, download the structured Markdown output and submit it directly to any LLM.
Walkthrough 02
Search a gene directly, compare evidence across datasets, export filtered gene-level results, and prepare an AI-readable Markdown report.
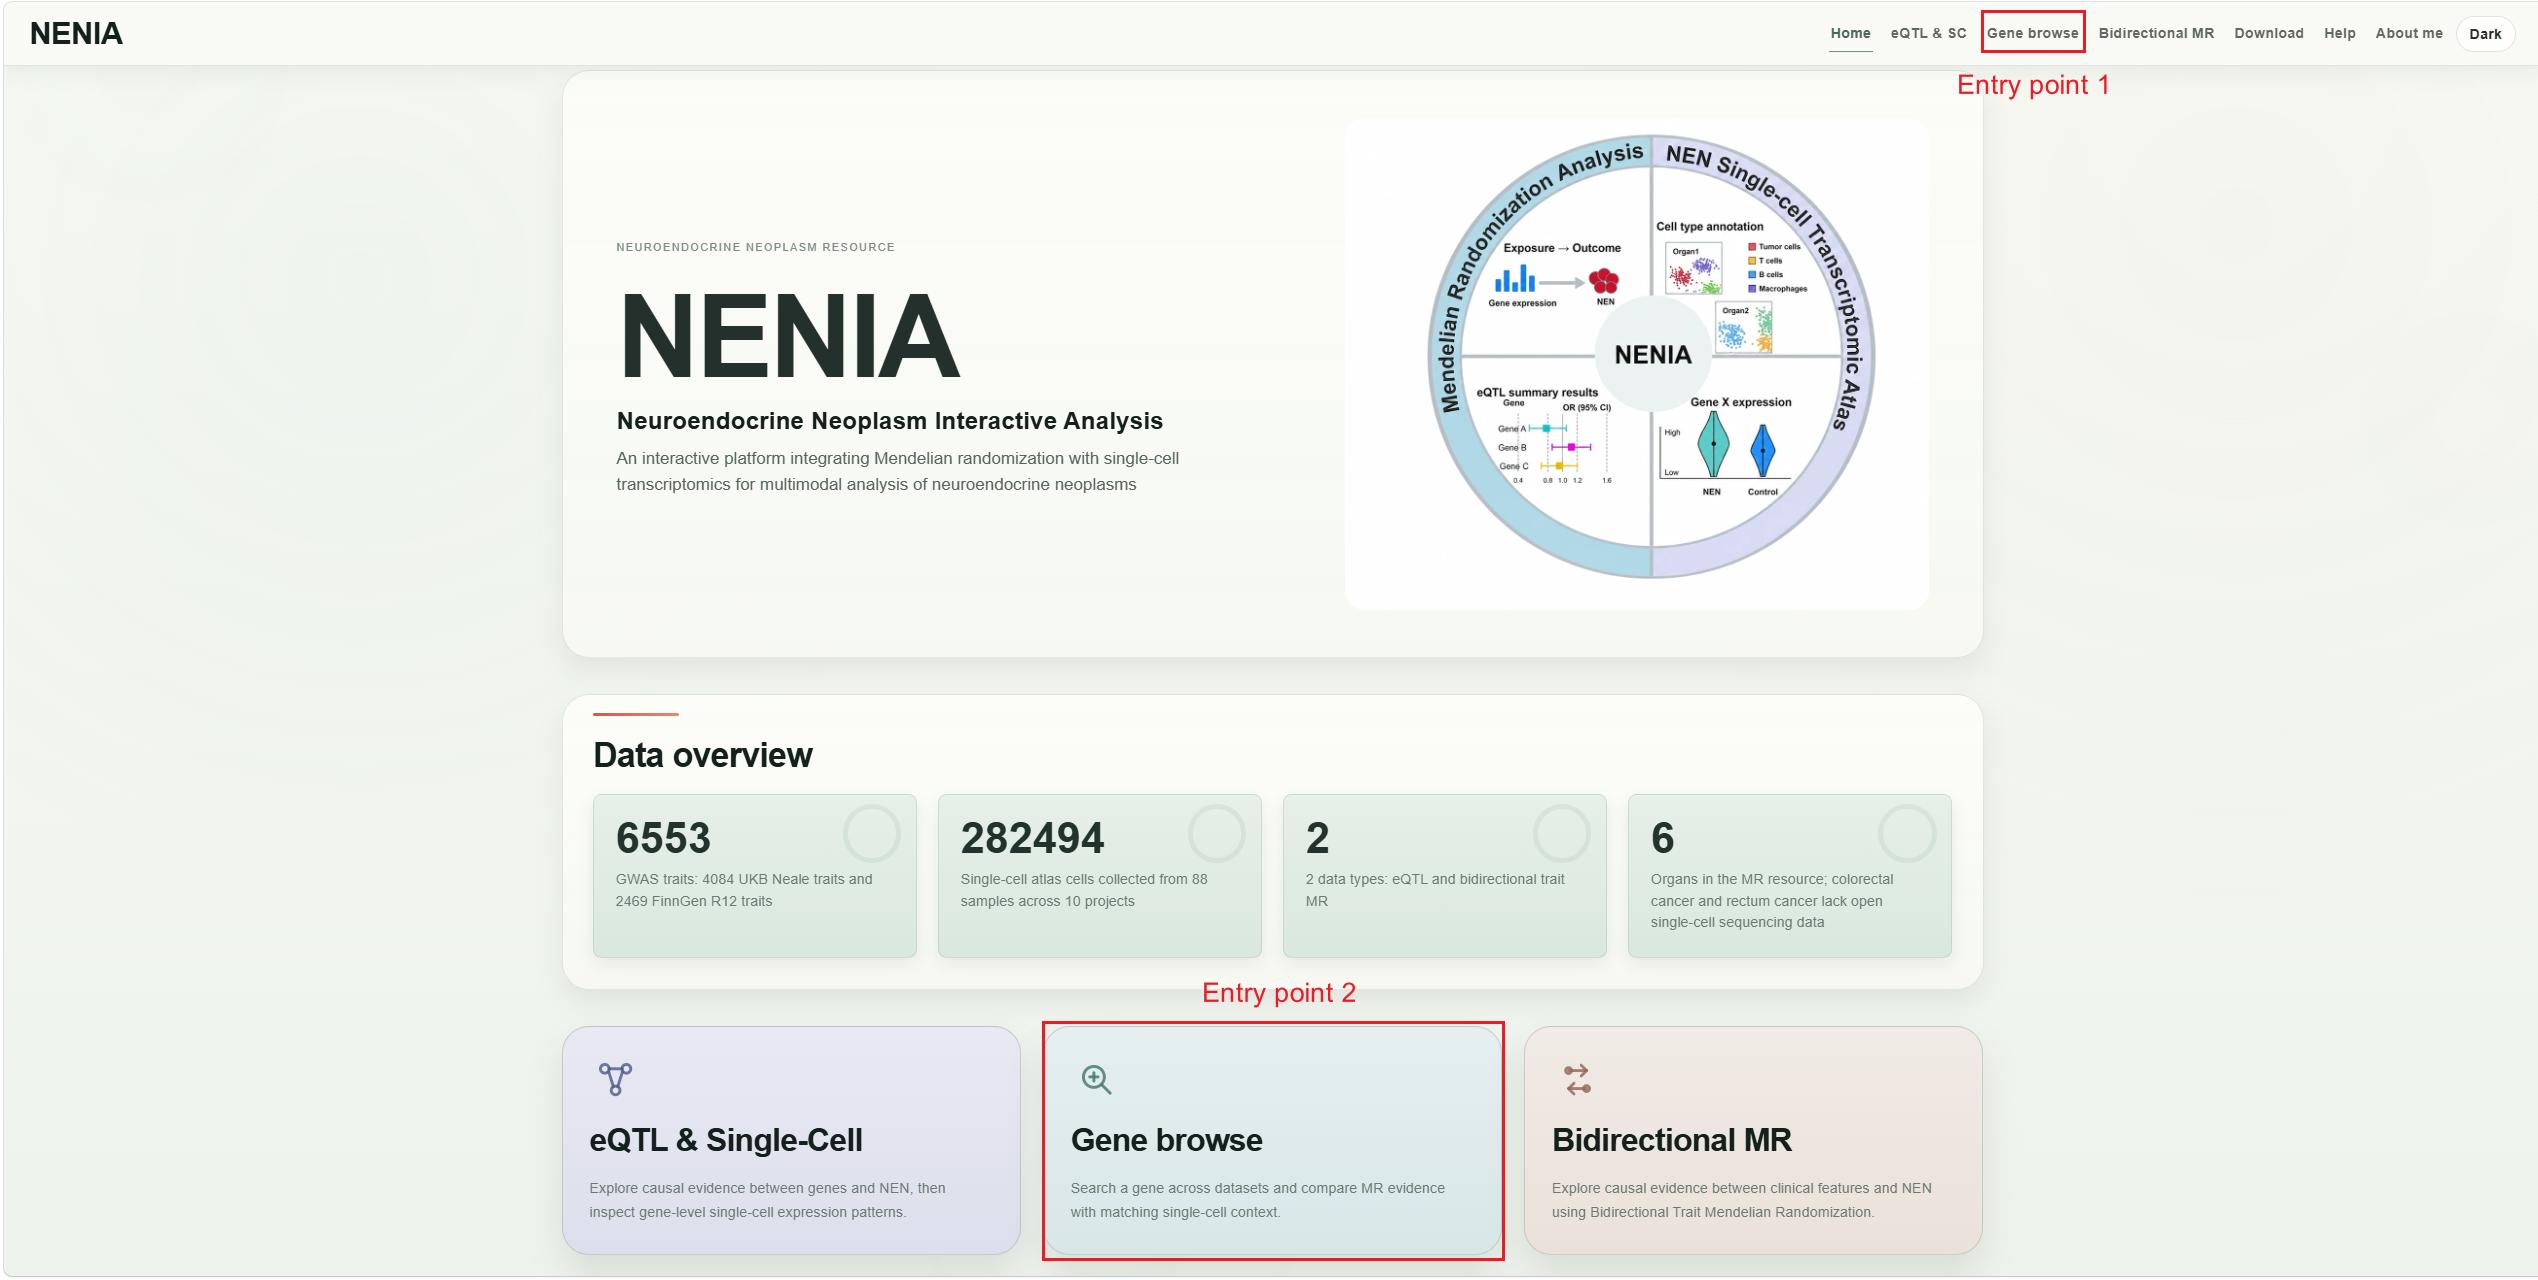
Use the Gene browse navigation item or the home-page entry card when the analysis starts from a known gene.
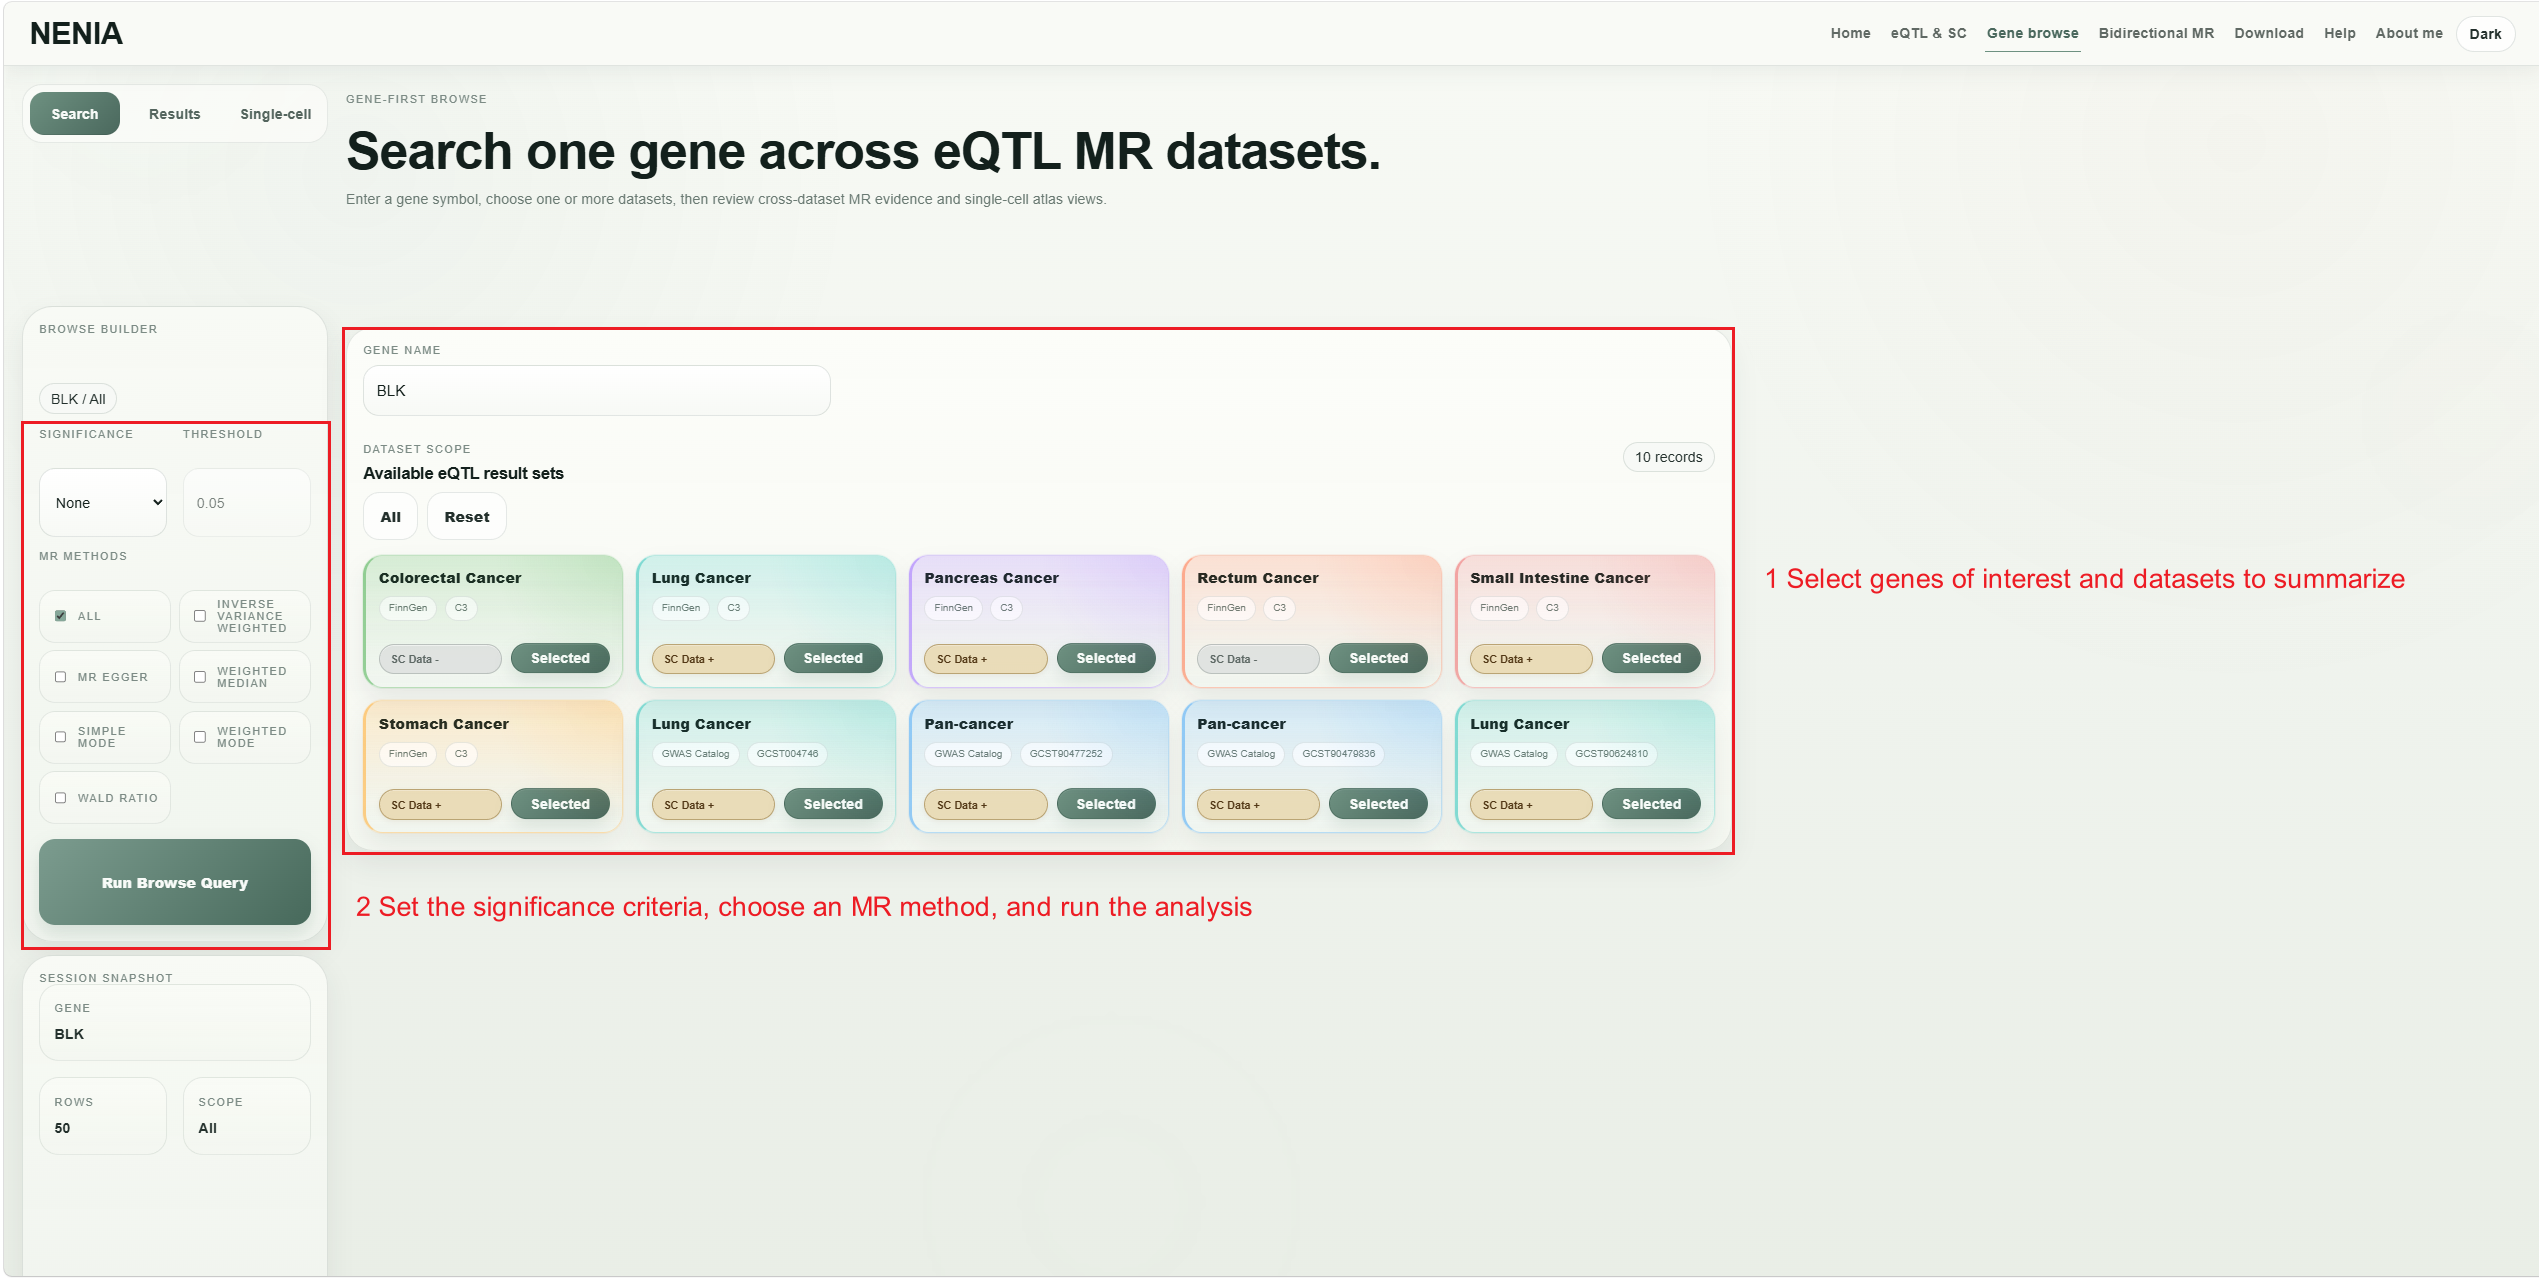
Enter a target gene, select the datasets to summarize, then set the significance criteria, threshold, and MR method before running the query.
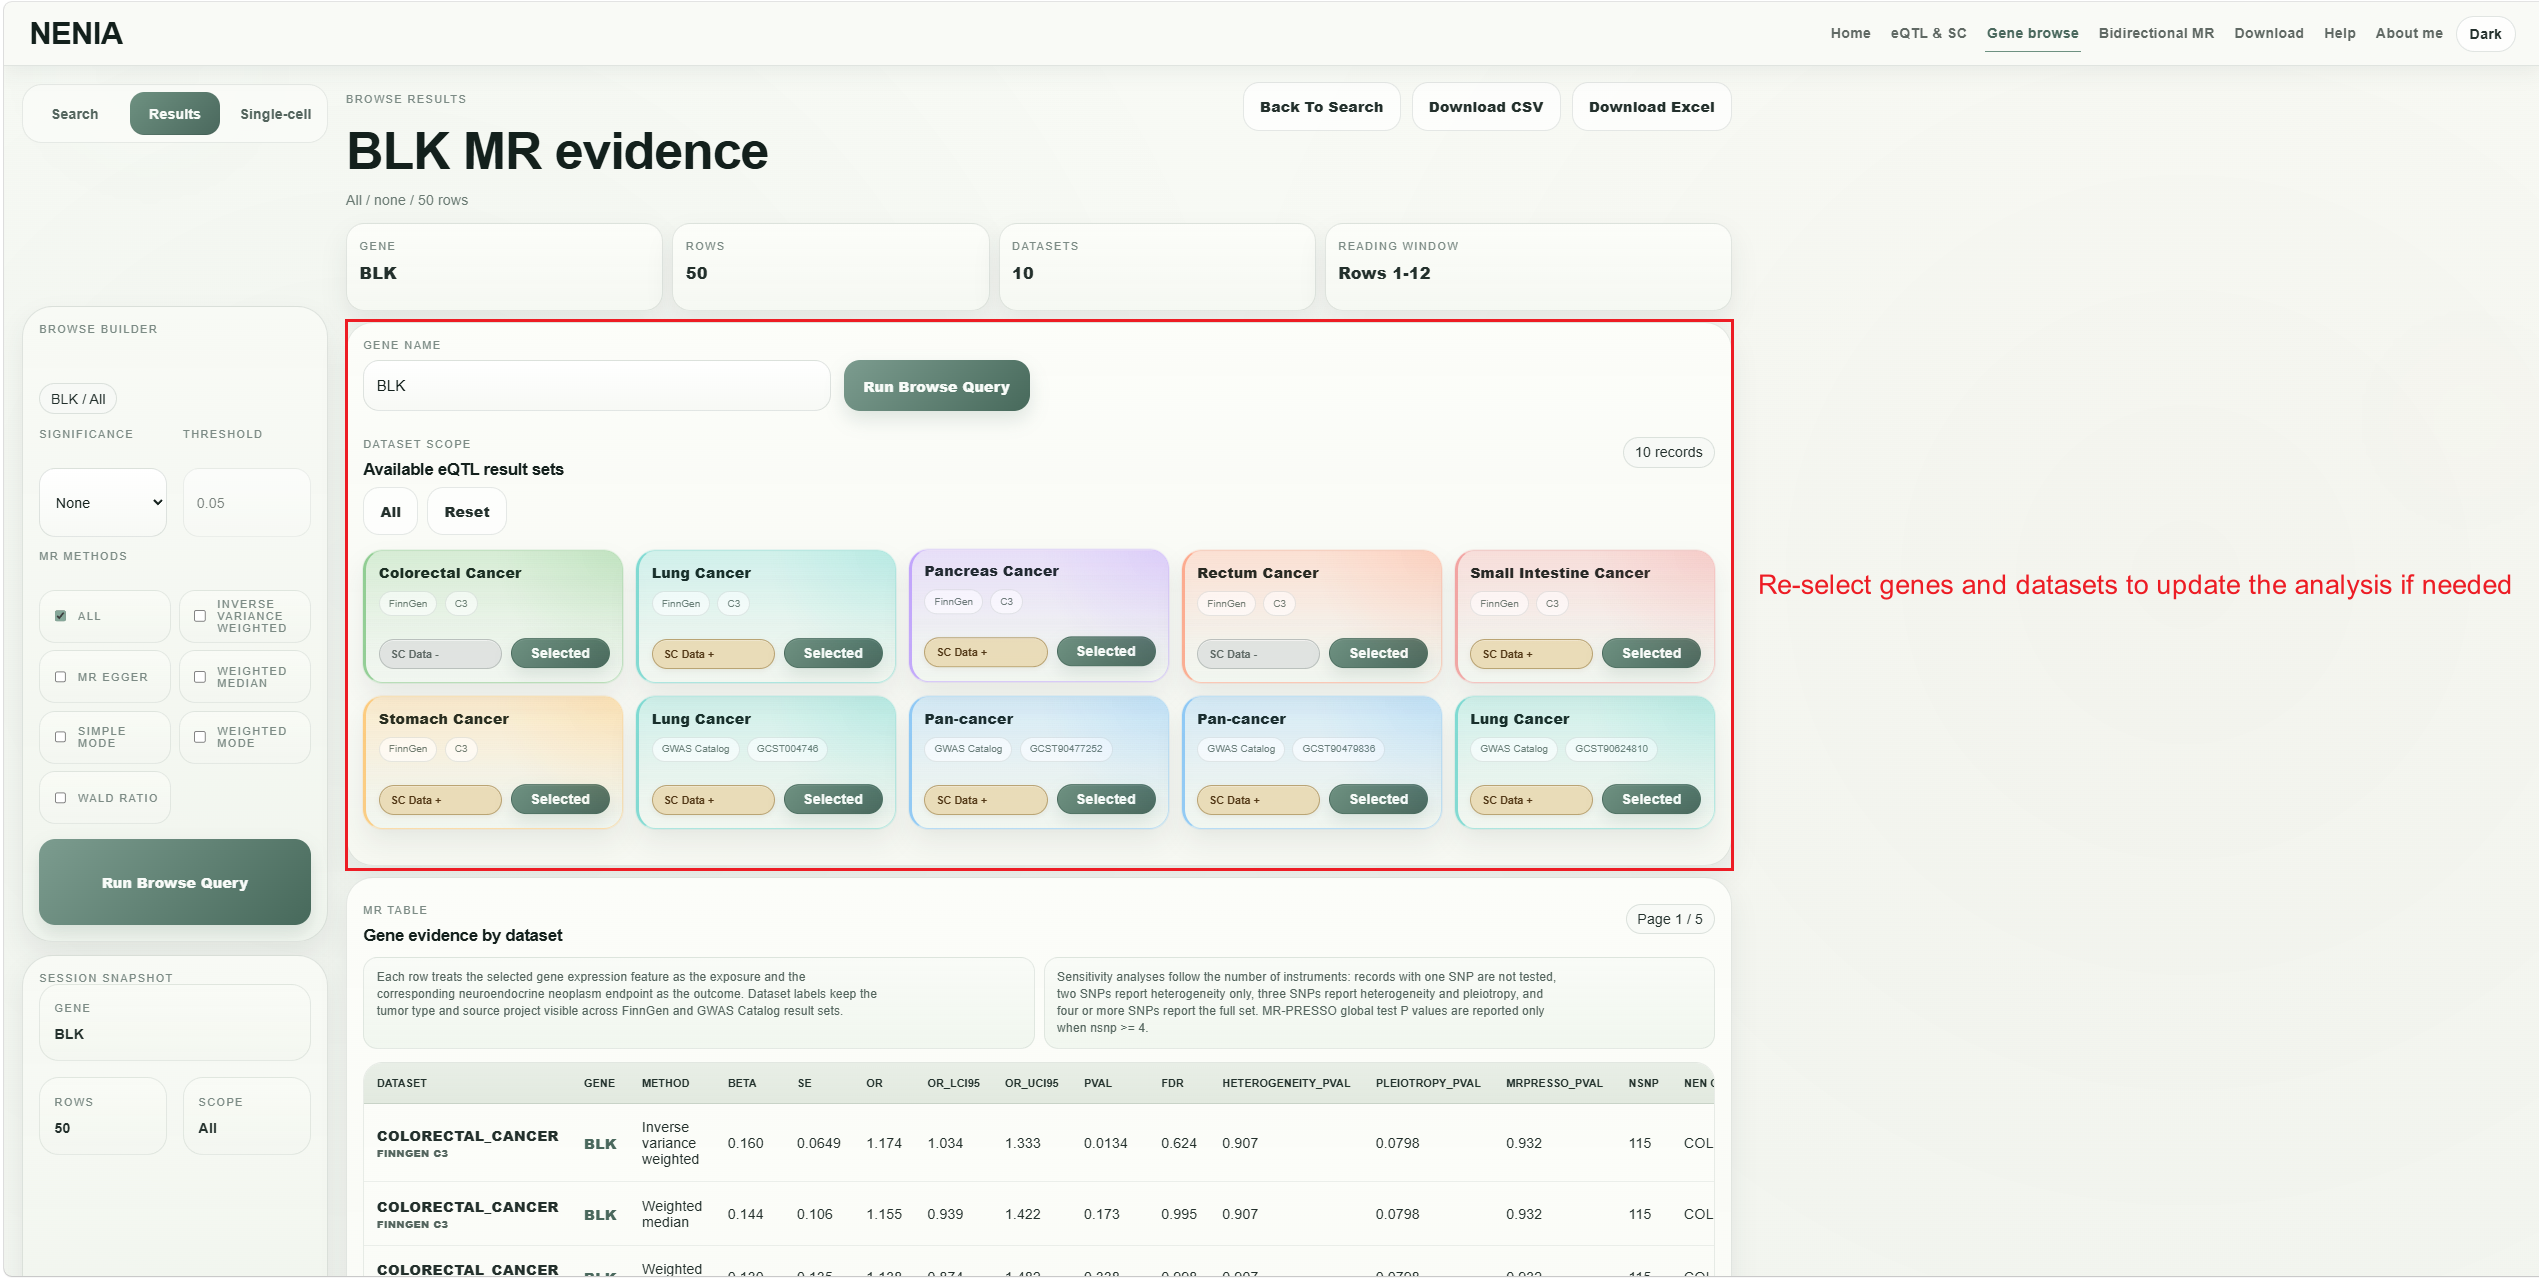
Use the results-page controls to reselect the target gene or dataset set, then rerun the browse query when the evidence scope needs refinement.
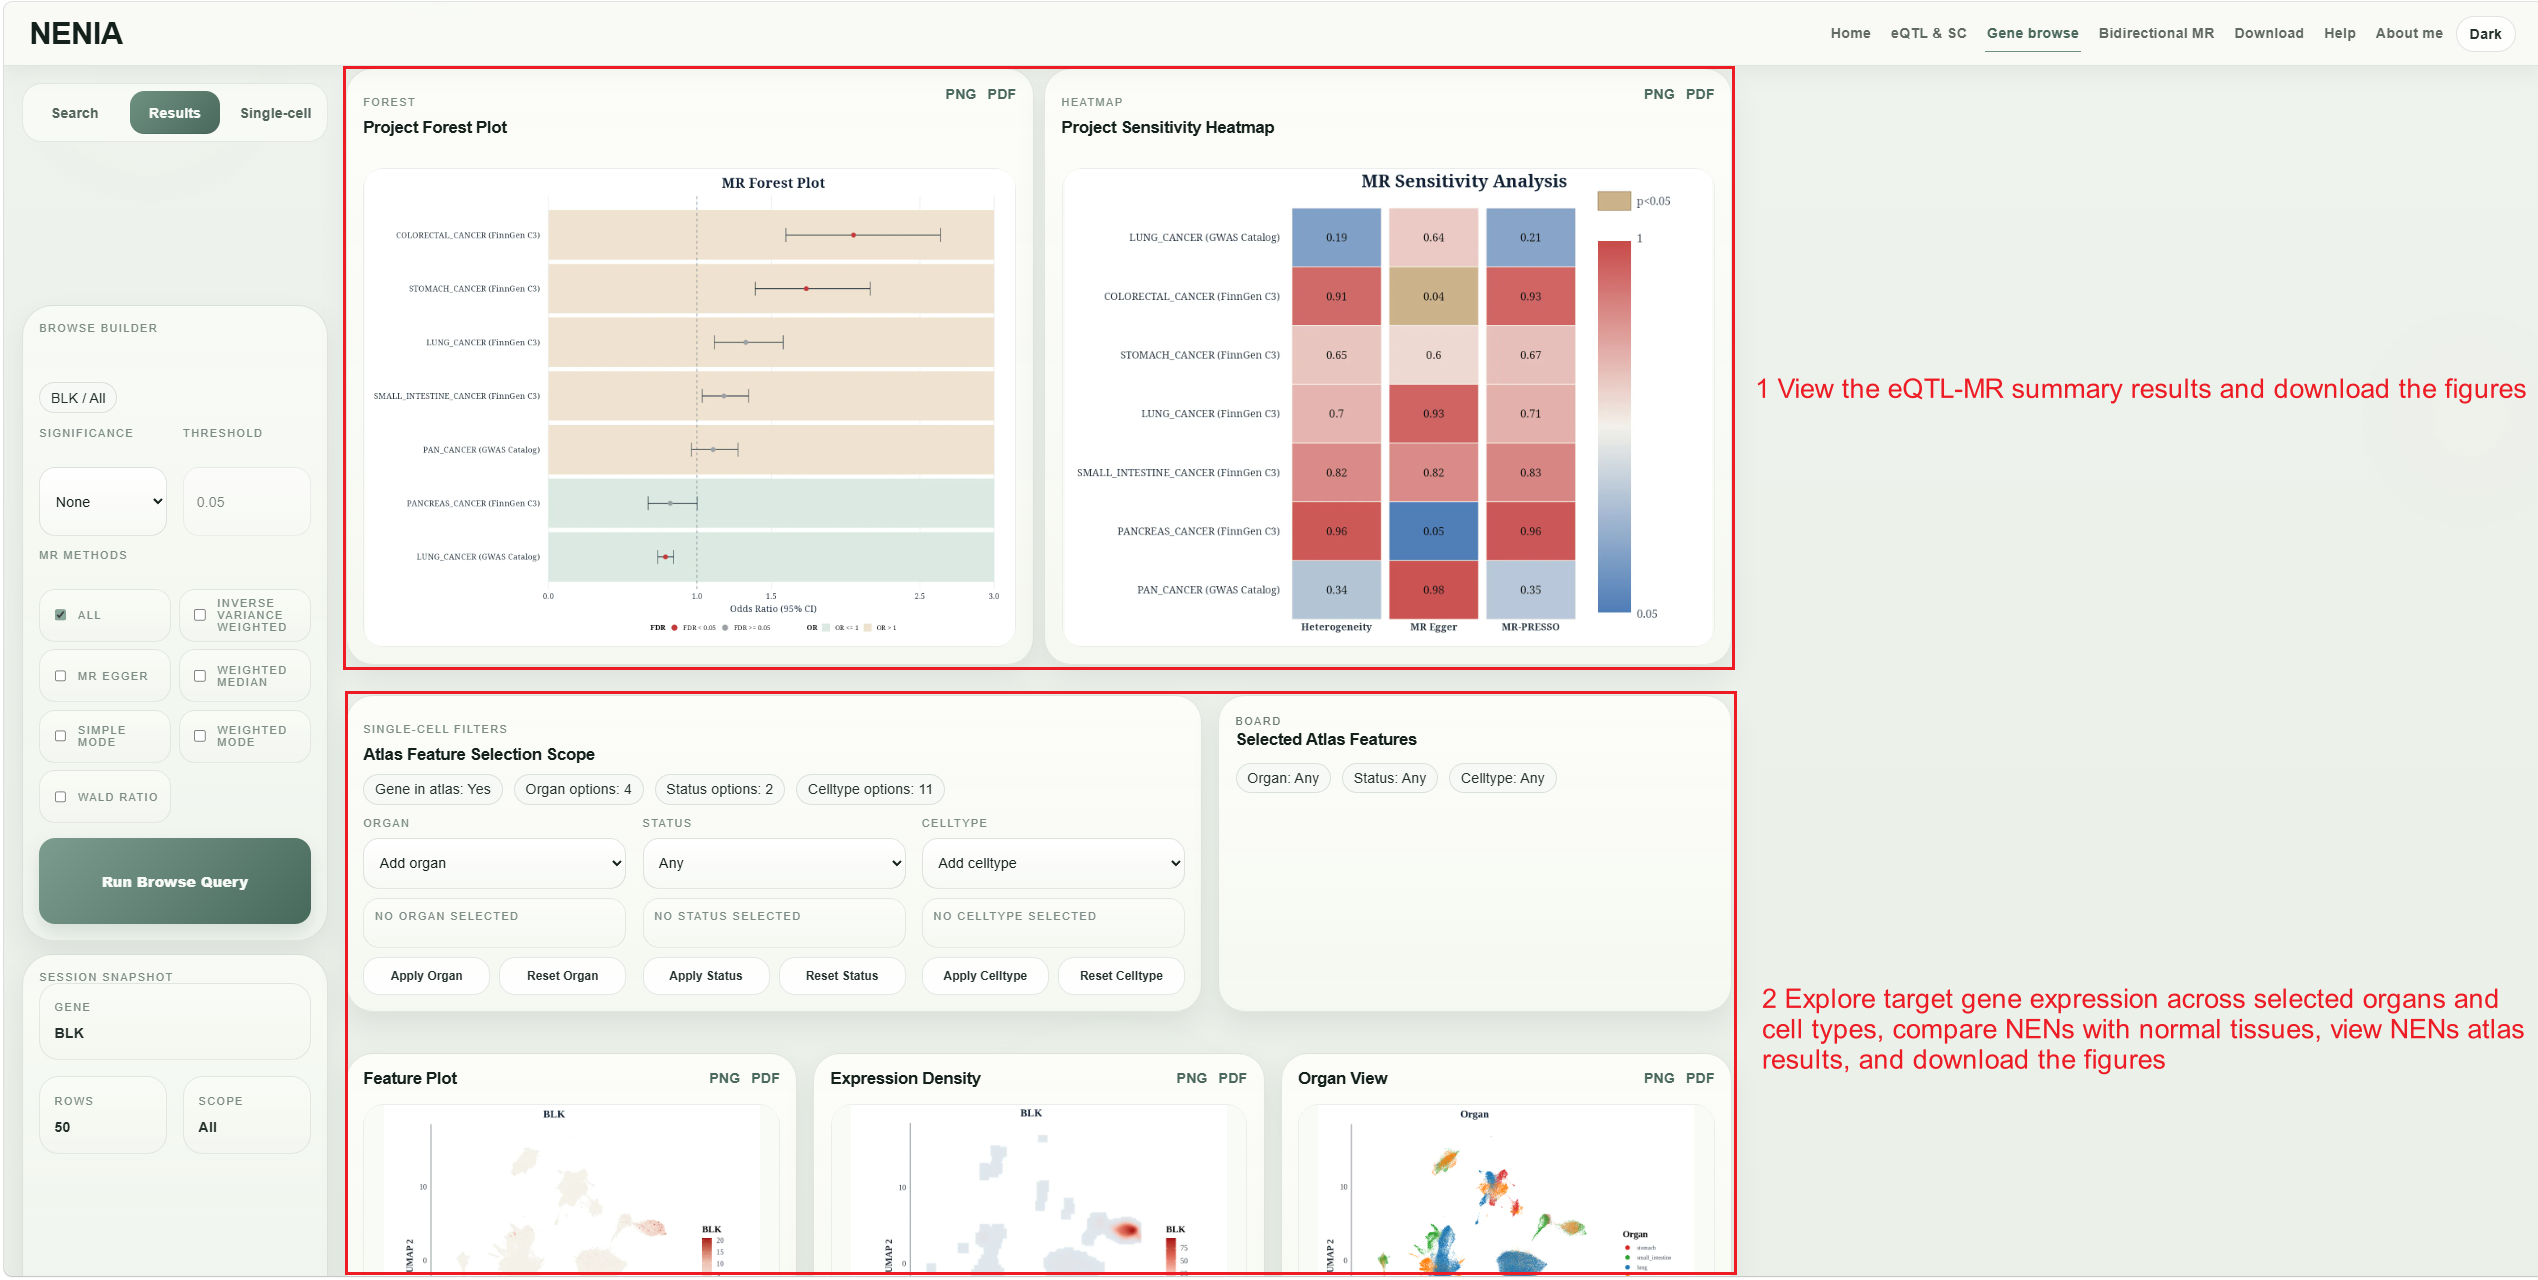
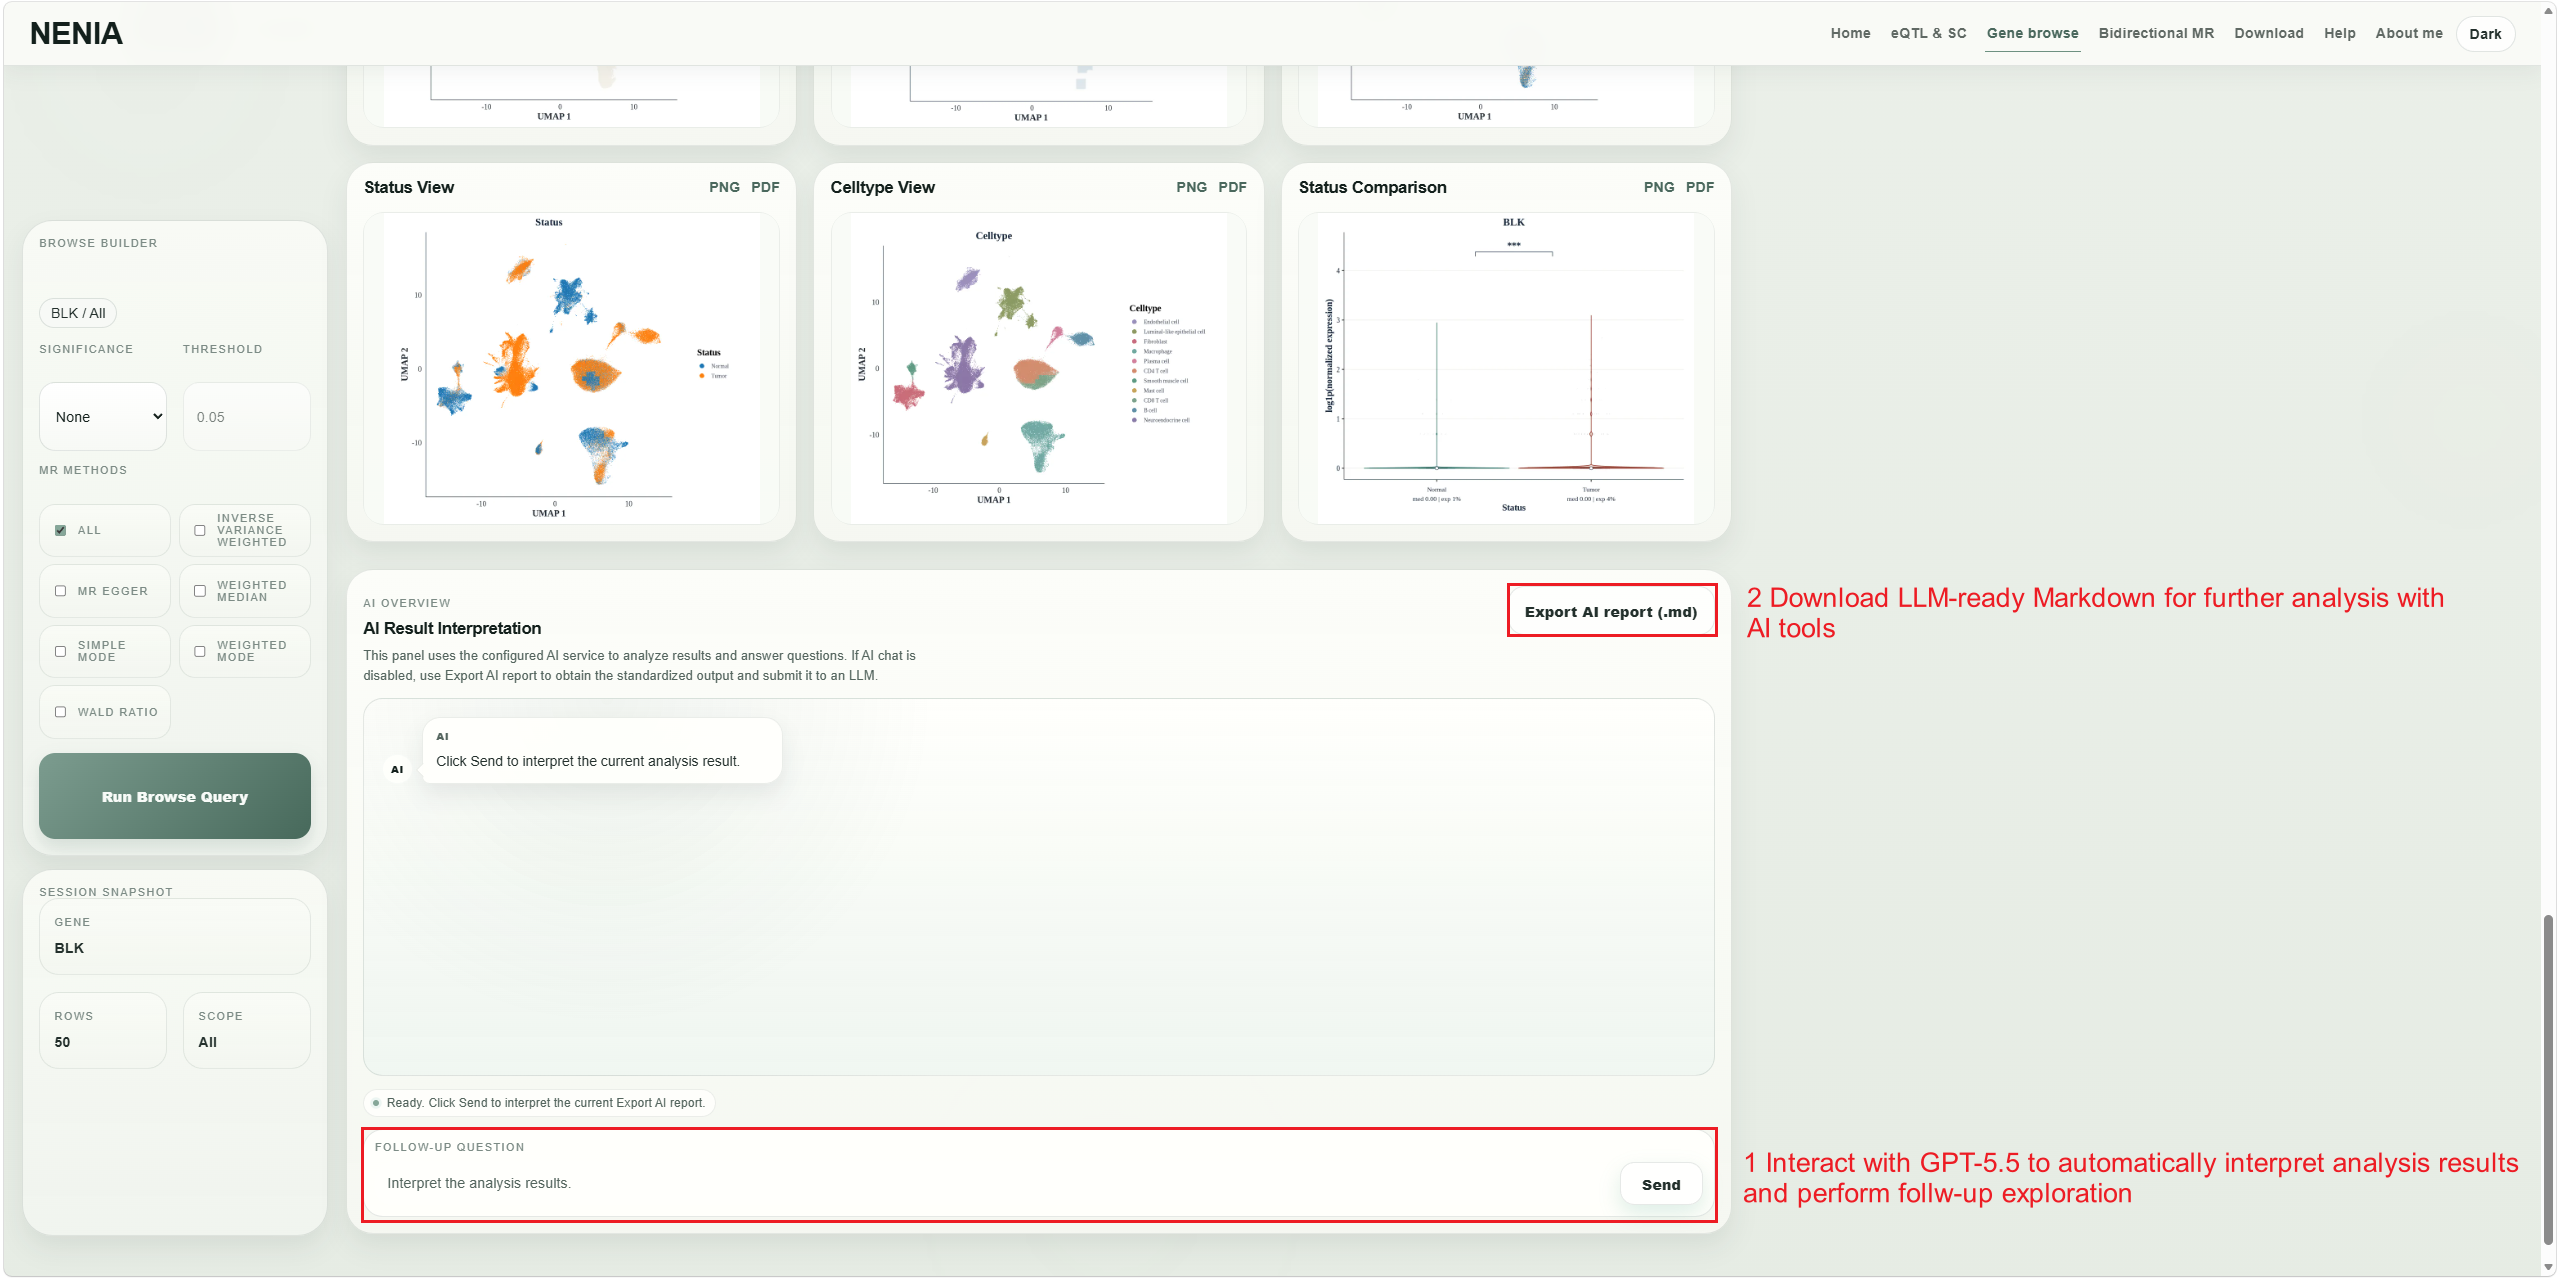
Review eQTL-MR summary figures, inspect target-gene expression across selected organs and cell types, compare NENs with normal tissue, and download the relevant figures.
Use the built-in GPT-5.5 panel to analyze results or ask follow-up questions up to three times per day. The first request is fixed as result interpretation with a prepared prompt; for deeper analysis, download the structured Markdown output and submit it directly to any LLM.
Walkthrough 03
Explore trait-oriented Mendelian randomization evidence for phenotypes related to neuroendocrine neoplasms, then export a compact AI-ready report context.
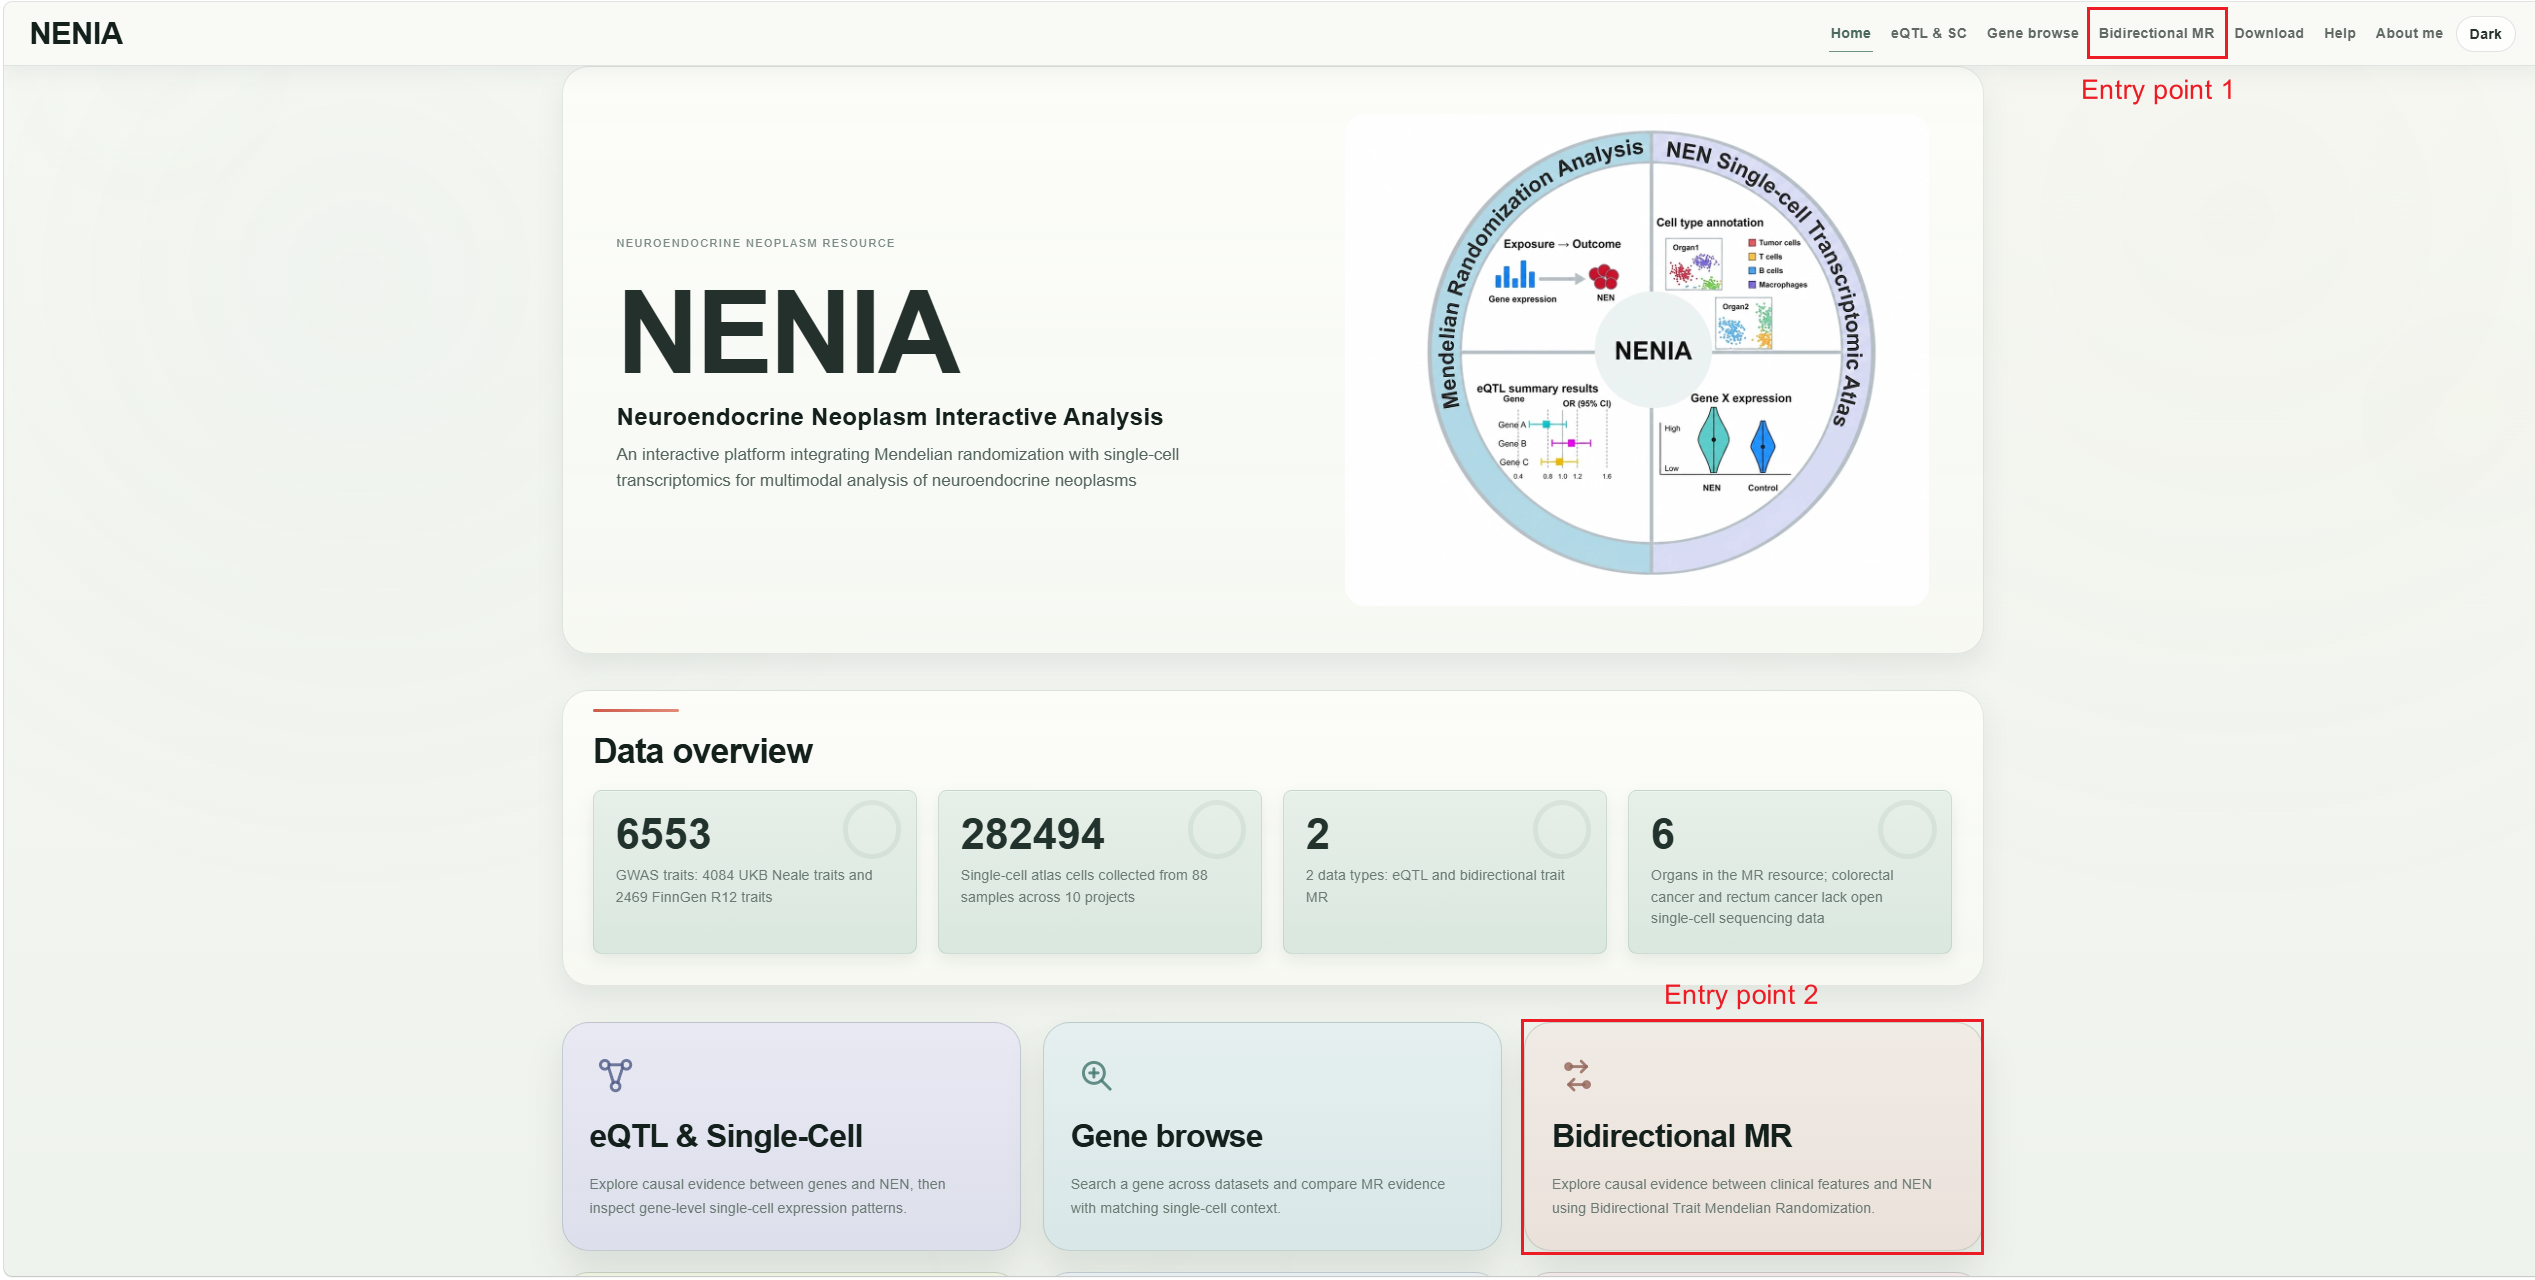
Use the Bidirectional MR navigation item or the home-page entry card when the analysis starts from trait-oriented MR evidence.
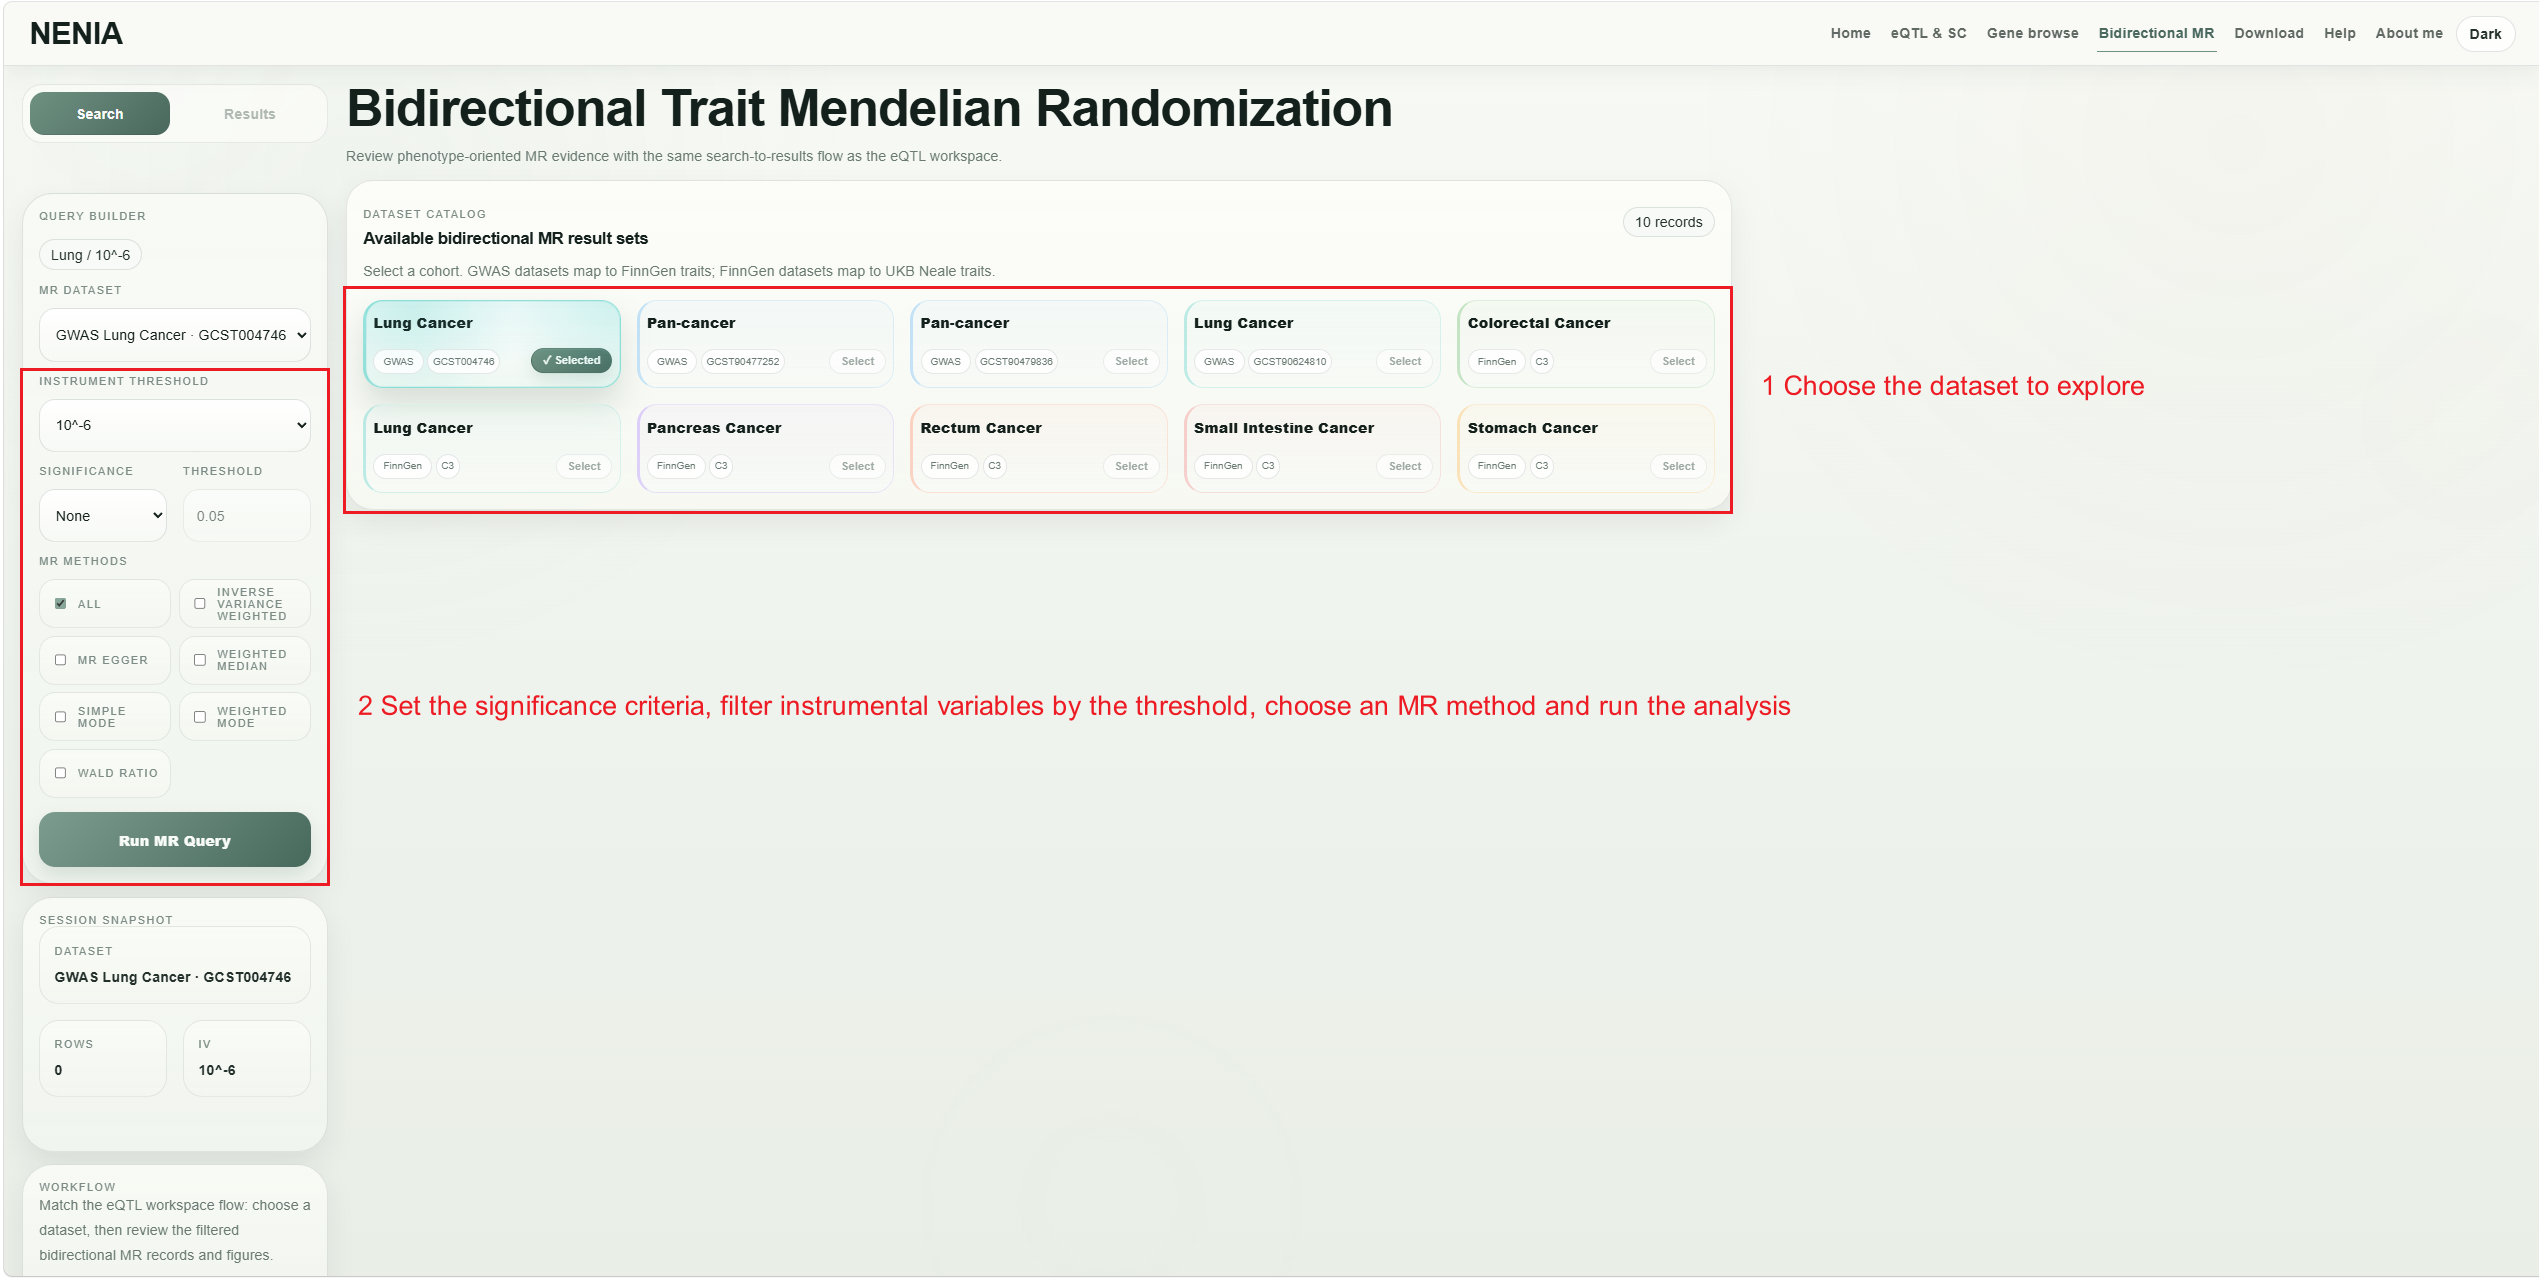
Select the dataset to explore, filter instrumental variables by the threshold, set the significance criteria and threshold, choose an MR method, and run the analysis.
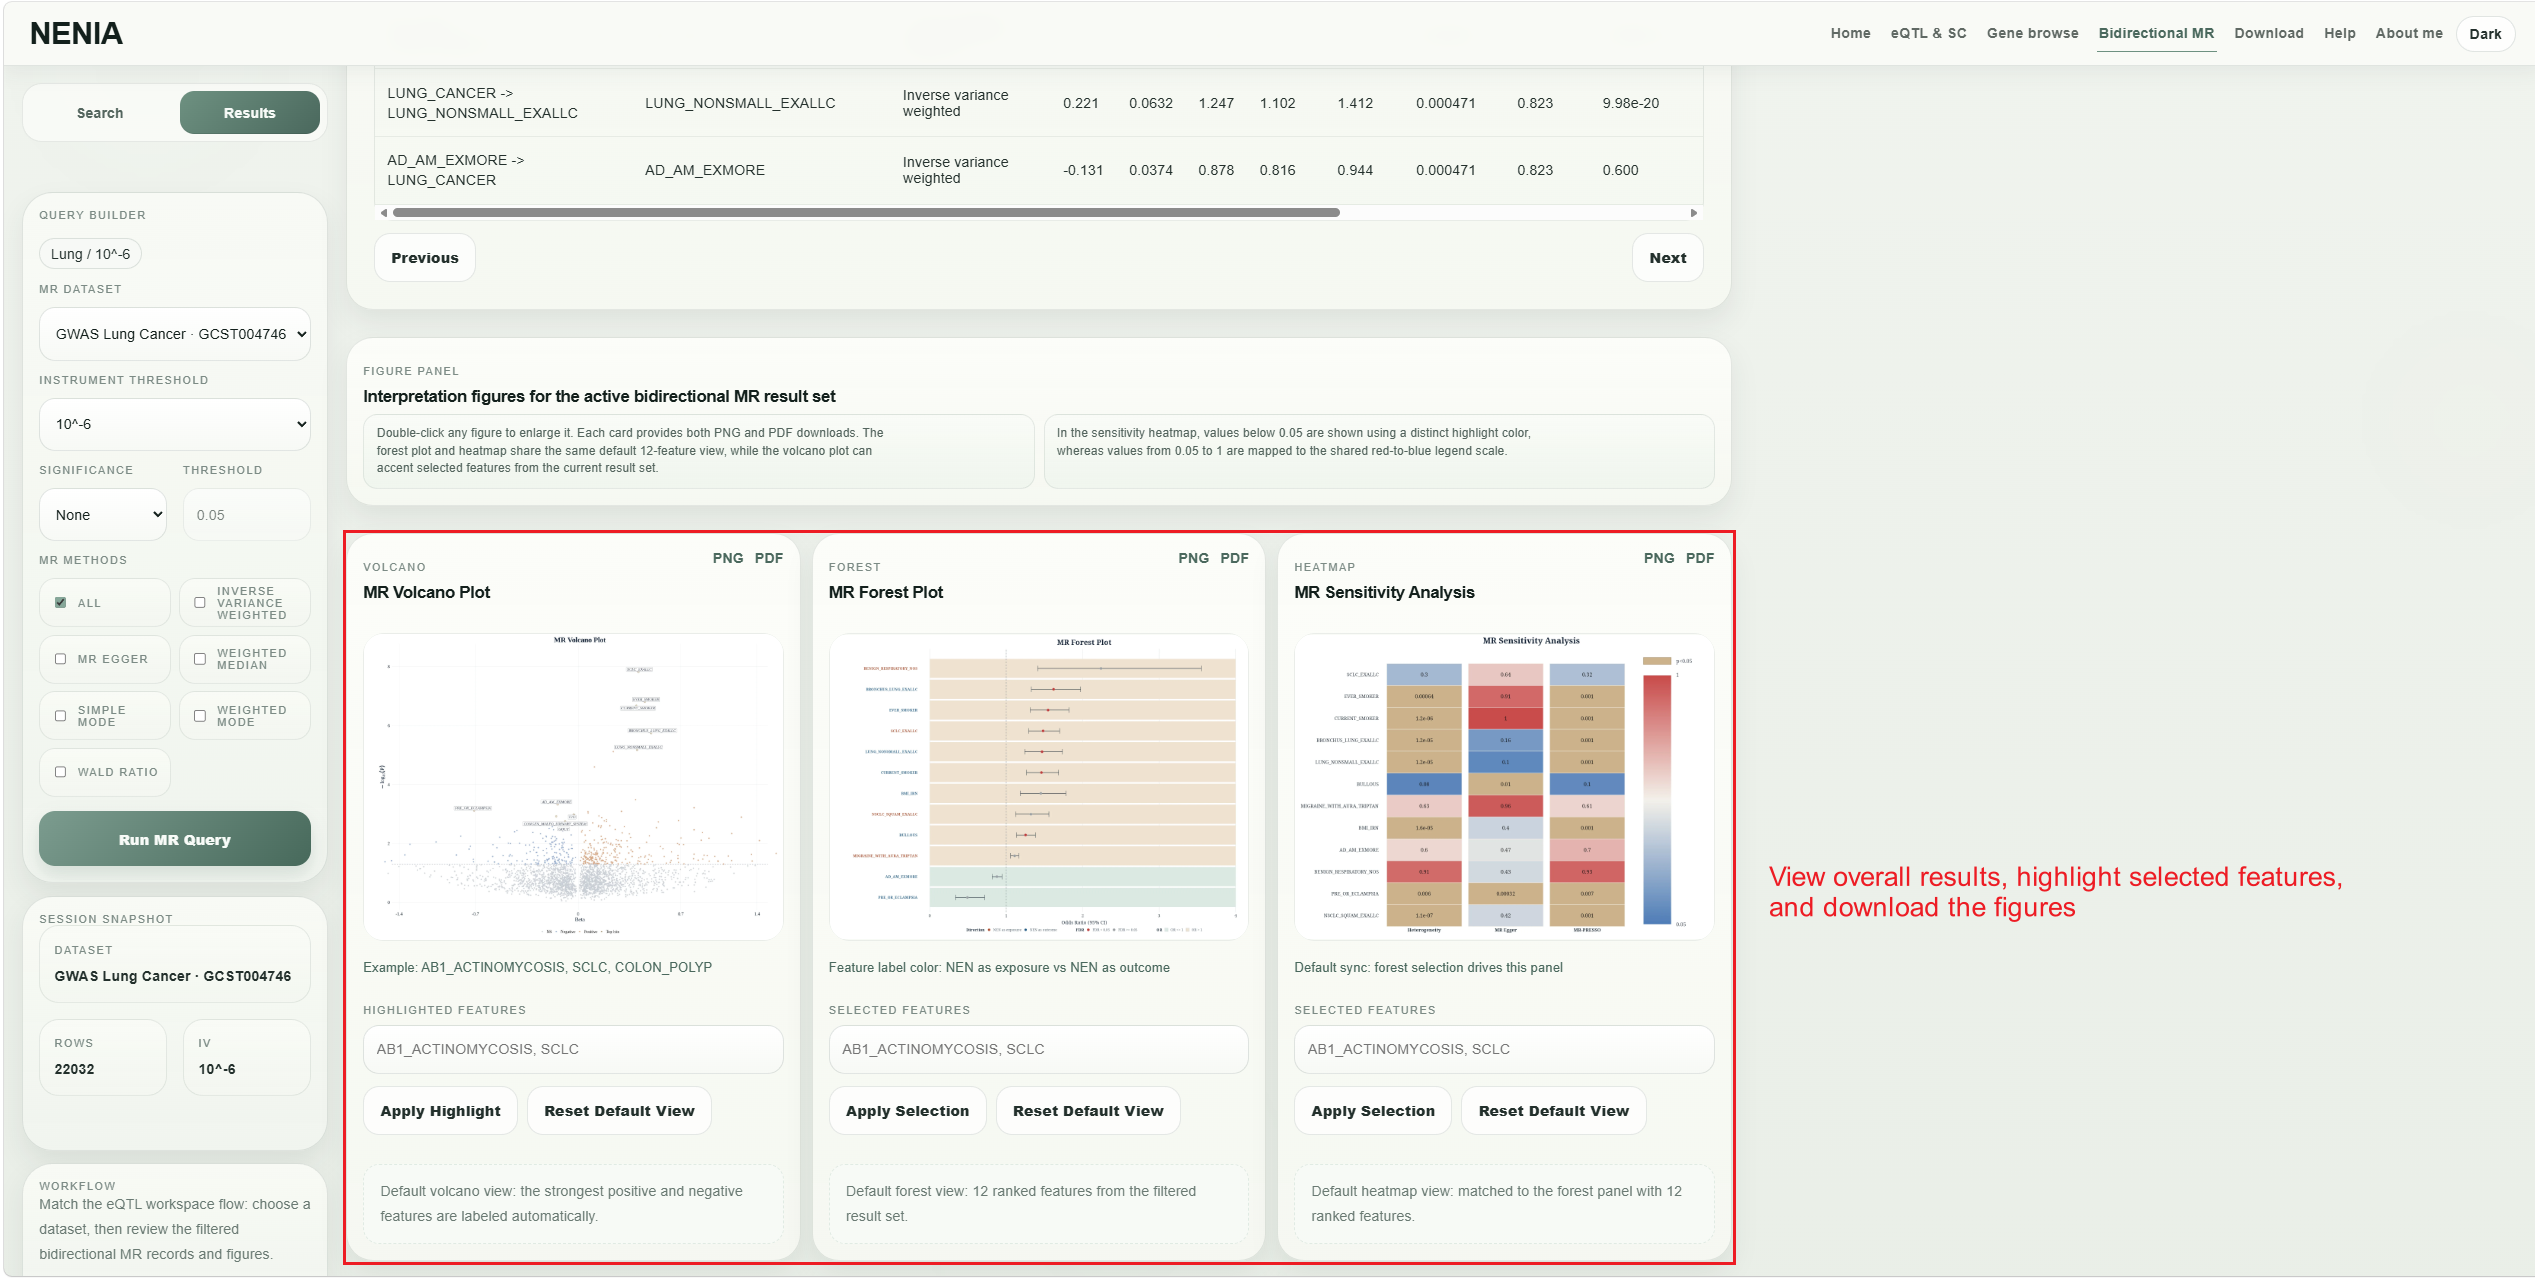
Review the bidirectional MR result table and plots, highlight selected features, and download the volcano, forest, and sensitivity figures.
Use the built-in GPT-5.5 panel to analyze results or ask follow-up questions up to three times per day. The first request is fixed as result interpretation with a prepared prompt; for deeper analysis, download the structured Markdown output and submit it directly to any LLM.